If you’re looking to set up Xymon on a fresh Ubuntu 20.04.4 LTS installation, this guide is for you. I’ve recently performed a clean install and fully patched the system before installing Xymon. For demonstration purposes, I allocated 8 cores, 16GB of RAM, and a 90GB drive, which is admittedly a bit overkill for Xymon. Here’s a step-by-step tutorial to help you install Xymon on Ubuntu 20.04.
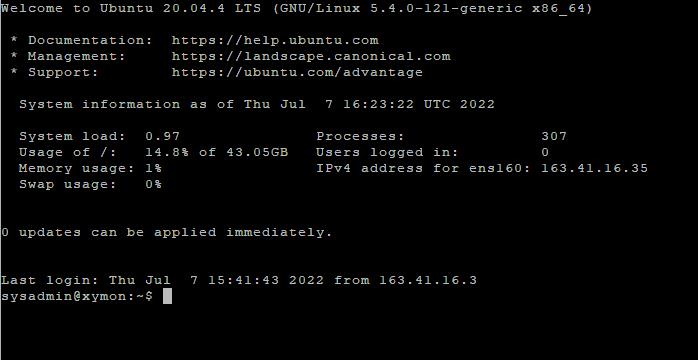
First, establish an SSH connection to your server.
Update your package list by running the following command:
sudo apt-get update
Install the required dependencies for Xymon by executing the following command:
sudo apt-get install apache2 rrdtool librrd-dev libpcre3-dev libssl-dev ldap-utils libldap2-dev fping
Install Xymon using the following command:
sudo apt-get -y install xymon
During the installation process, you’ll encounter a pink configuration screen prompting you to provide a static IP address. It is highly recommended that you use a static IP for your Xymon server.
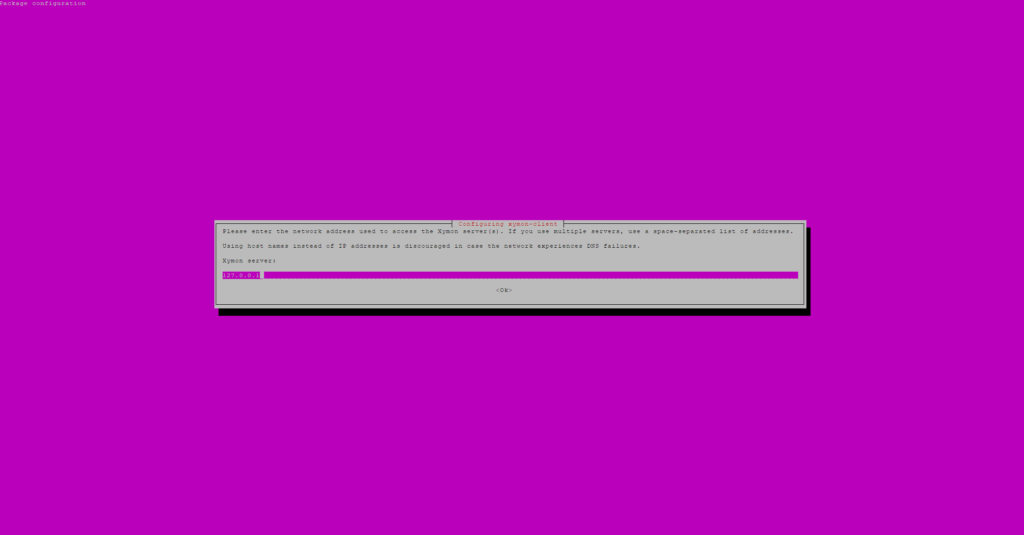
Input the desired static IP address and press Enter to continue.
At this point, the Xymon server installation is complete. However, we still need to configure user access via the Apache web server.
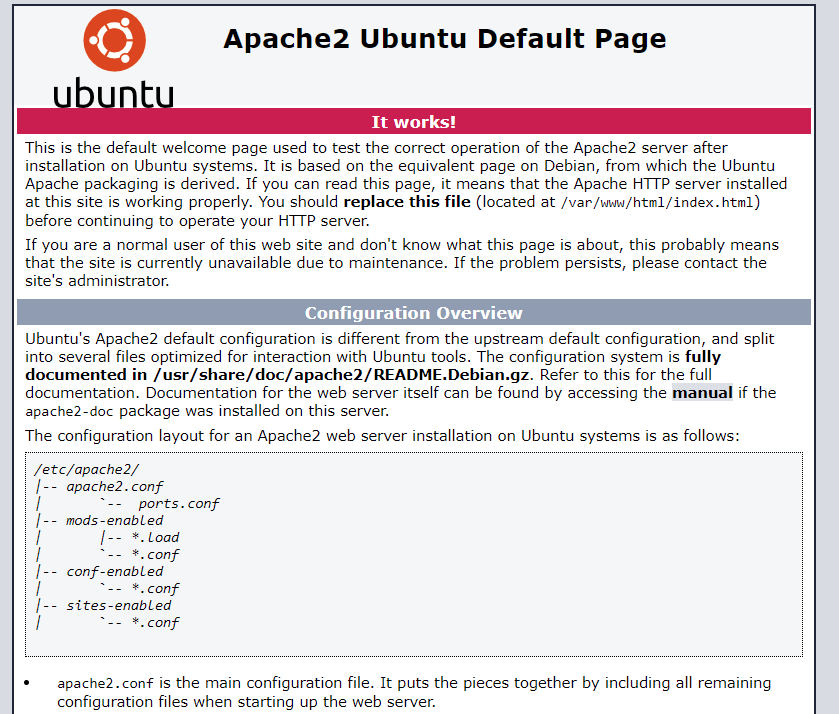
To verify that Xymon is properly installed, open a web browser and navigate to your server’s IP address: http://<YOURSERVERIP>. You should see the Apache2 Ubuntu Default Page, confirming the successful installation of both Xymon and Apache.
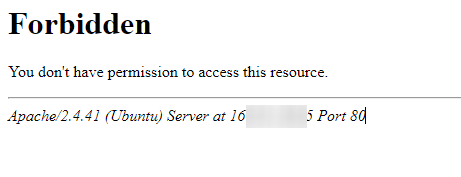
Now, let’s test if we can access the Xymon web interface. In your browser, navigate to http://<YOURSERVERIP>/xymon. You’ll likely encounter a “Forbidden” page, indicating that you don’t have permission to access the server. This is actually a good sign, as it means the Xymon server is operational; we just need to grant the appropriate access.
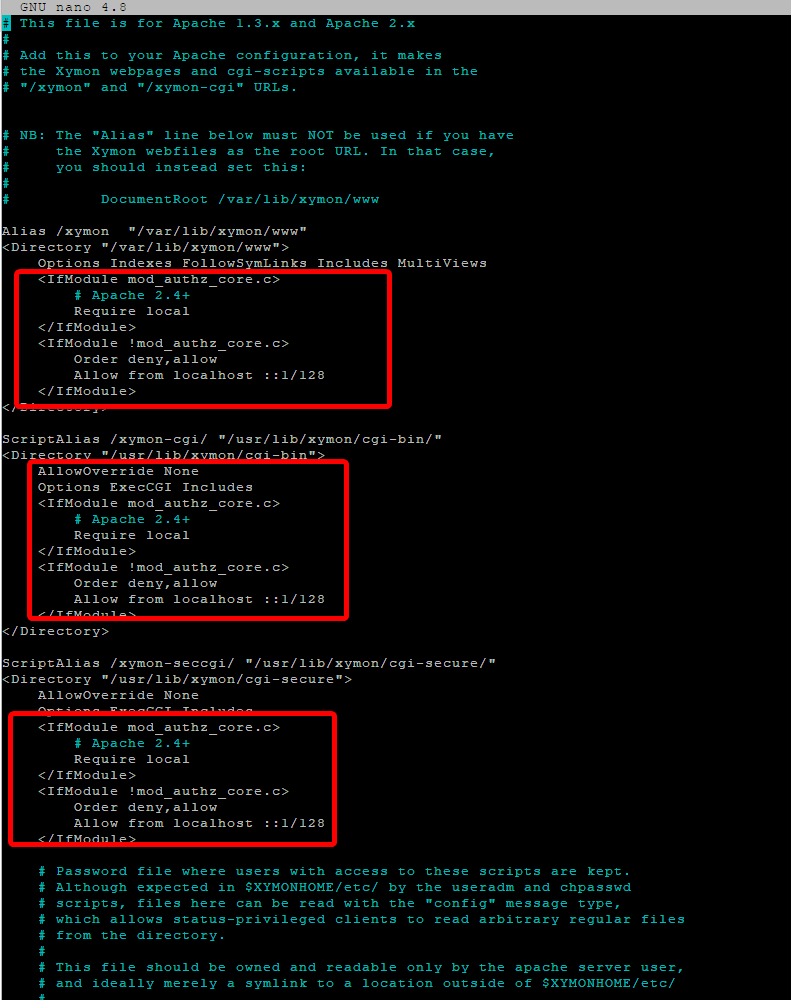
Return to your SSH session connected to your server, and open the xymon.conf file in Apache2 for editing:
sudo nano /etc/apache2/conf-enabled/xymon.conf
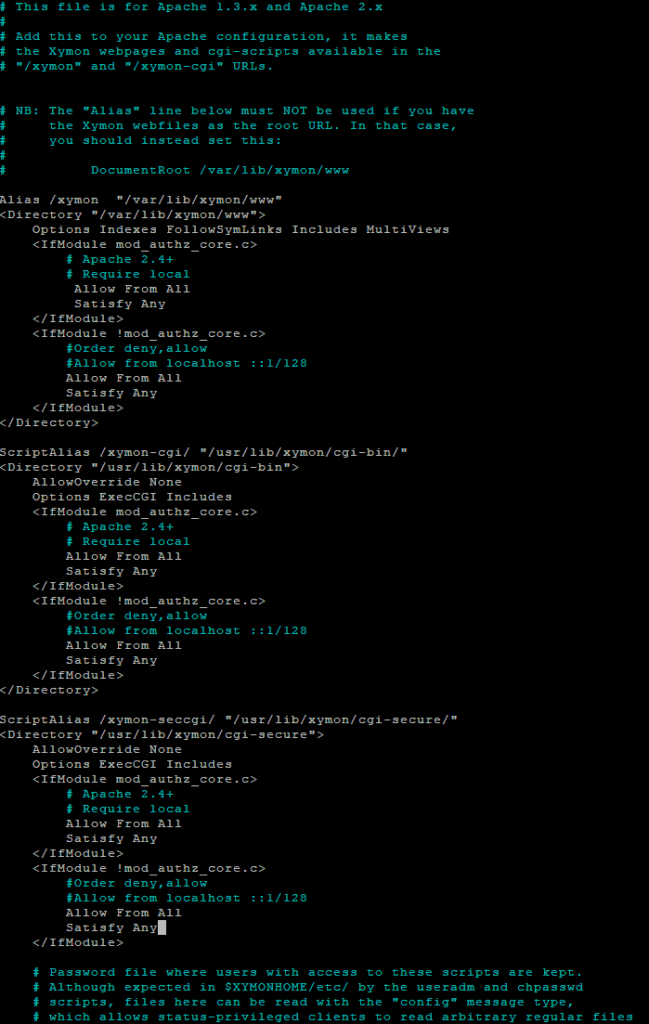
In this tutorial, I will demonstrate how to grant access to everyone, which is not the most secure or recommended approach. However, if you prefer a more secure method, refer to Xymon’s official installation guide, specifically the “Configuring your webserver” section: https://xymon.sourceforge.io/xymon/help/install.html
Within the xymon.conf file, locate and modify the three sections outlined in red below, according to your desired level of access:
 Allow From All
 Satisfy Any
After
Once you’ve made the necessary modifications to the xymon.conf file, press Ctrl + X to exit the file, followed by ‘Y’ to save your changes.
- Restart the Apache service to apply the updated configuration:
sudo systemctl restart apache2.service
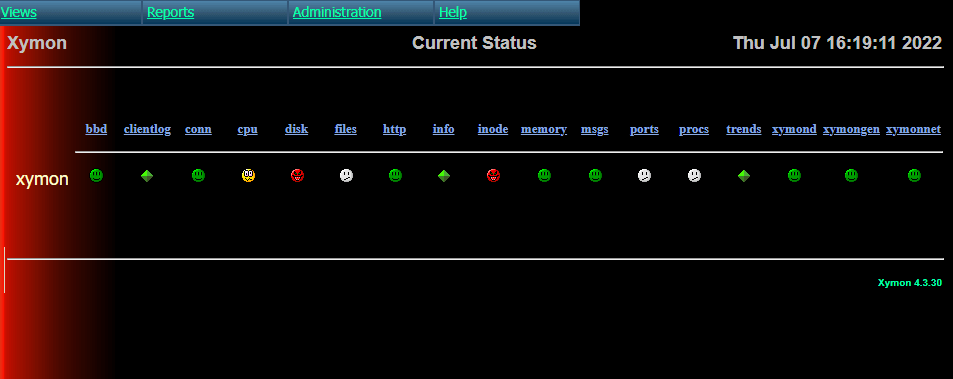
Finally, revisit the Xymon web interface by navigating to http://<YOURSERVERIP>/xymon in your browser. You should now be able to access the Xymon dashboard without encountering any permission issues.
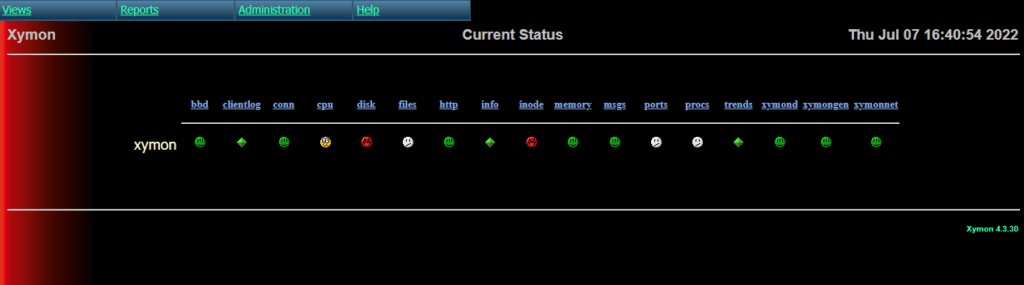
Congratulations! You should now see the Xymon dashboard, confirming that your installation and configuration are successful. Enjoy monitoring your systems with Xymon!


I can confirm this isn’t working for me. I am getting an error
Preparing to unpack …/xymon_4.3.30-1build3_amd64.deb …
Failed to stop hobbit-client.service: Unit hobbit-client.service not loaded.
Failed to stop xymon-client.service: Unit xymon-client.service not loaded.
invoke-rc.d: initscript xymon-client, action “stop” failed.
I can confirm these directions work 100% without any modification.
i followed this guide and im glad to report this worked. This guide saved my behind ..
Yeah I came back here again as I needed to reinstall Xymon on Ubuntu, though this issua may plage Ubuntu 24 as well. You will not get a clean Xymon install unless these three things prior:
apt purge xymon
apt purge xymon-client
ps aux | grep xymon
* kill any xymon process that are still running. They will be the case if you’ve already had Xymon on the server and are reinstalling.
If you do not kill any remaining xymon process, this includes the vmstat process owned by user xymon, you will not get a fresh installation and you’ll go crazy trying to use this or any other instructions. I’ve confirmed through testing a few times the above scenario and it’s 100% true for xymon on Ubuntu 20.04, and probably the same on 24.04.
Completely purge xymon (xymon-client if applicable), and make sure there are no running xymon processes or processes owned by user ‘xymon’ still running.