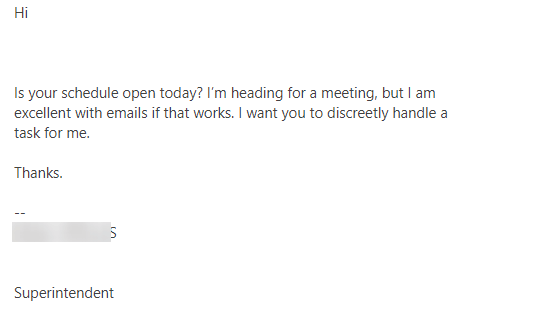
In a recent security event, an unauthorized party launched a phishing campaign impersonating our superintendent. To preempt a flood of support tickets and enhance our organization’s cybersecurity posture, we swiftly took action to eliminate the malicious email from all user mailboxes across the network.

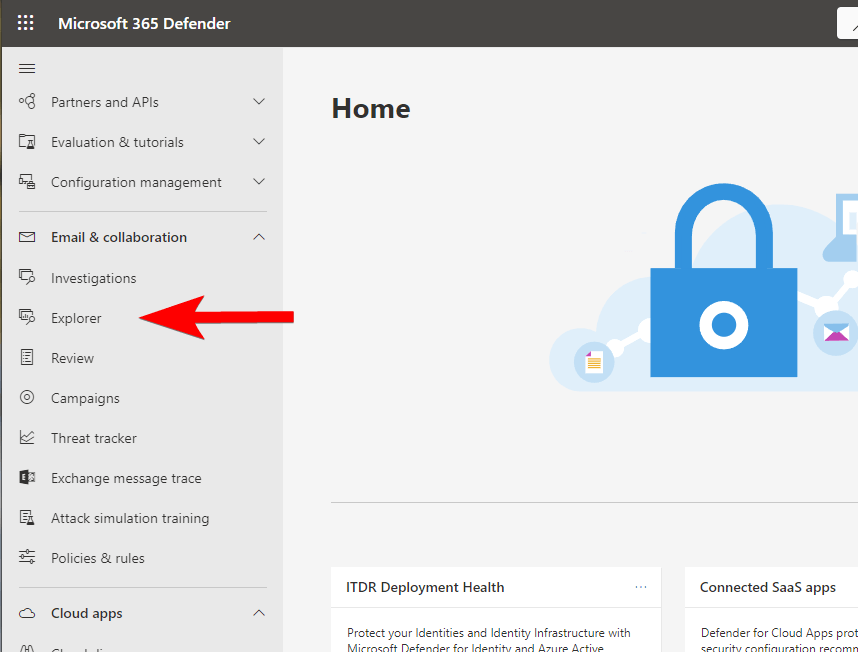
I discovered the most straightforward approach was utilizing O365 Defender. You can log in at https://security.microsoft.com/
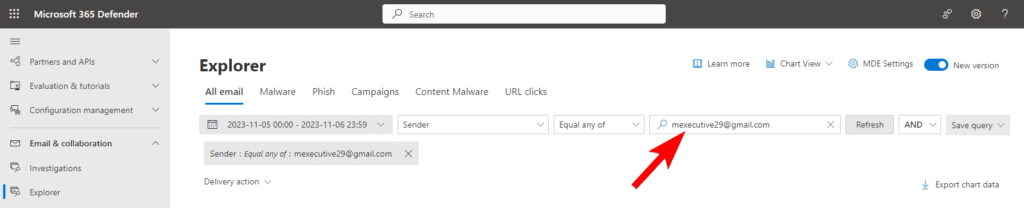
To tailor the search to our specific needs, which in this case was a single email address linked to the phishing attempt, I simply adjusted the query parameters in O365 Defender. After inputting the email address in question, I clicked on ‘Refresh’ to initiate the search
Once you’ve identified the suspicious emails, select them, then navigate to ‘Message actions’ and choose the appropriate action you wish to take.
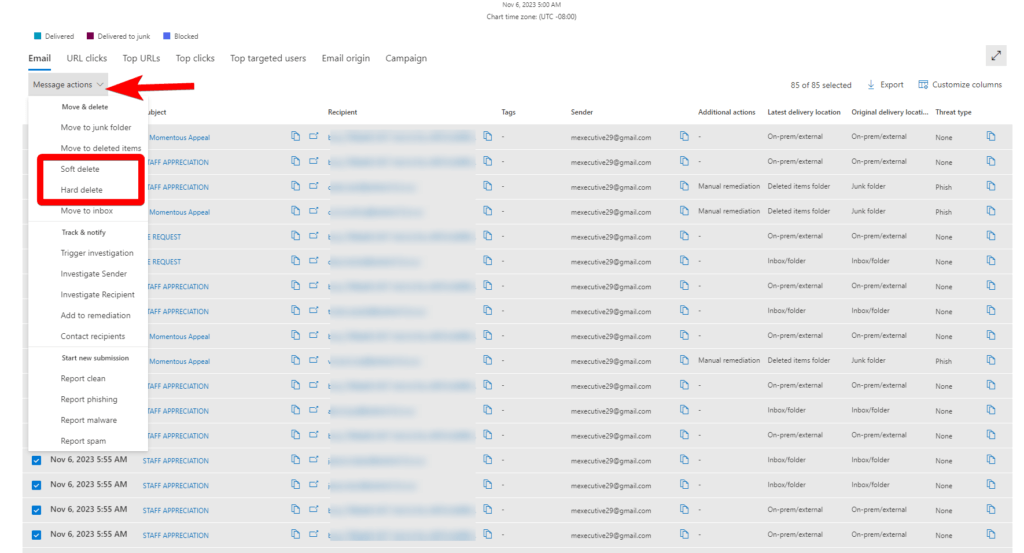
Following this, fill out the subsequent pages with the required information. Be aware that processing times may vary, and it could take a little while for the action to be fully completed.
In summary, swiftly identifying and removing a phishing email is crucial to maintain the cybersecurity of our school district. With O365 Defender, this task is not only manageable but also efficient. Remember, the speed of response can significantly reduce the potential impact of phishing attempts. Once you’ve set your desired actions and submitted the necessary data, O365 Defender will handle the rest, though it may take some time to fully process.