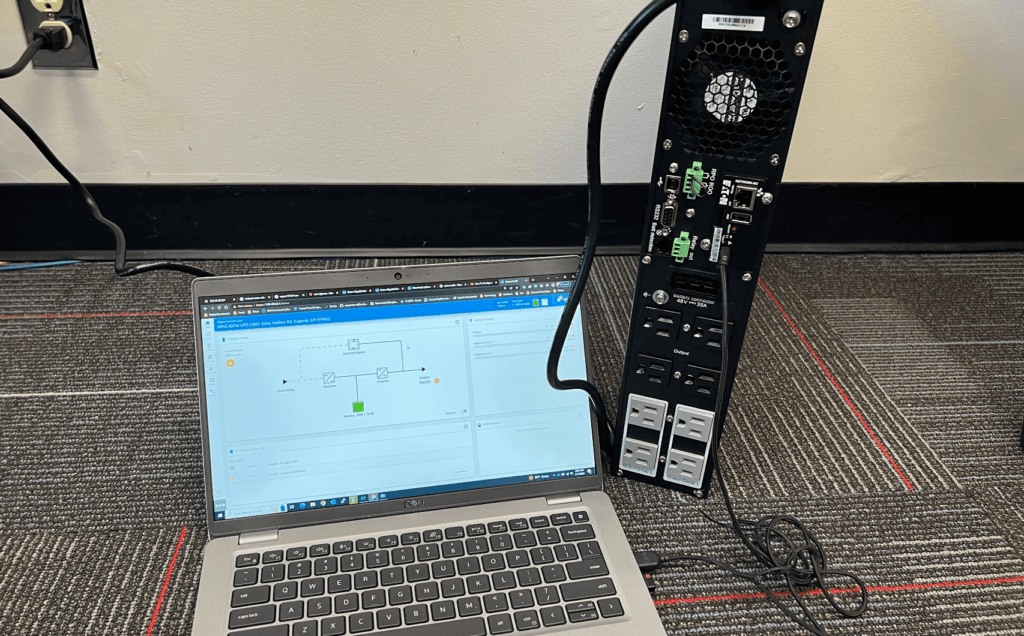
Connect the Micro-B USB cable to your machine.
Now you’ll need to setup the eth port on your machine by configuring RNDIS
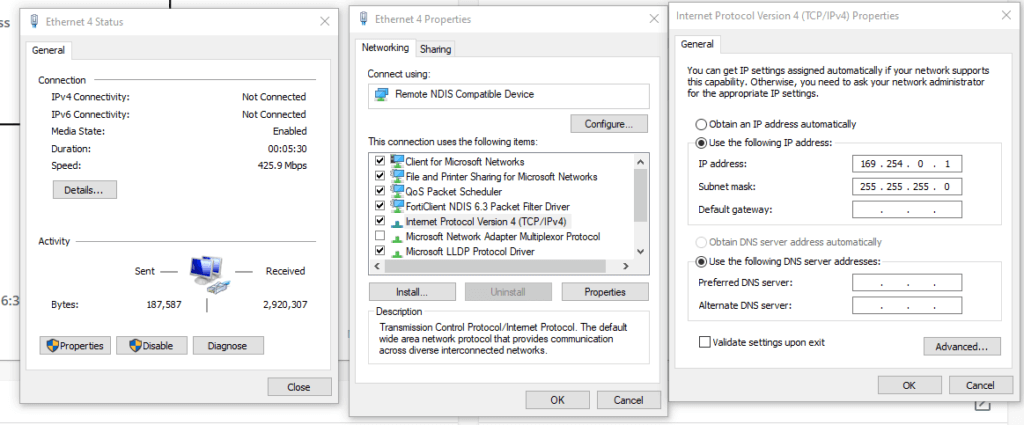
If Windows can’t find the driver automatically, go to Windows Control Panel > Network and Sharing Center > Local Area Connection. To emulate a network connection from USB, you need the RNDIS driver. Once you connect the card to your PC, Windows® OS should automatically search for the driver. If the OS finds the RNDIS driver, you can go to accessing the web interface. However, if the search fails, you’ll need to proceed with manual configuration. Here’s how to do it:
- Accessing the Network Module: Right-click on the RNDIS local area connection and select Properties.
- Installing the Network Management Module: Select Internet Protocol Version 4 (TCP/IPv4), and click the Properties button.
- Enter the configuration below (IP = 169.254.0.150 and mask = 255.255.0.0), validate, and click OK, then Close.
To access the web interface, follow these steps:
Open your web browser and navigate to https://169.254.0.1
You should now be able to login in.
Here is the Eaton Gigabit Network Card M2 Manual if needed