Today is an exciting day for me as I’m embarking on the task of rebuilding our 5-year-old sysctr server that was built on 2012R2. As I begin this process, I wanted to document the steps I’m taking to bring up a new instance alongside the existing server.
Rebuilding a server can be a daunting task, but with proper planning and execution, it can be done smoothly. In this blog post, I’ll take you through the steps I’m taking to rebuild our sysctr server.
The only thing missing from this which I already have configured from our previous SCCM setup is AD Schema. Great guide here.
Server Setup
My specs are overkill but I have a lot of headspace in my vSphere setup.
- Server 2022
- 32 CPU’s
- 48GB Ram
- C: 150GB (OS)
- D: 1TB (DATA)
- E: 150GB (SQL)
- 10GB NIC
Software Downloads
- Download SQL Server 2019 – I got it from VLSC but you can download it from the evaluation center.
- Download SQL Server Management Studio (SSMS)
- Download Windows ADK for Windows 11 – Link
- Download Microsoft Endpoint Configuration Manager – Current Branch – 2103 (Use VLSC if you have it)
- Download Microsoft SQL Server 2019 Reporting Services (SSRS) –
Active Directory Schema Extension
If your doing a new install you’ll need to complete this step. Since I already have a server, I’ll be skipping it.
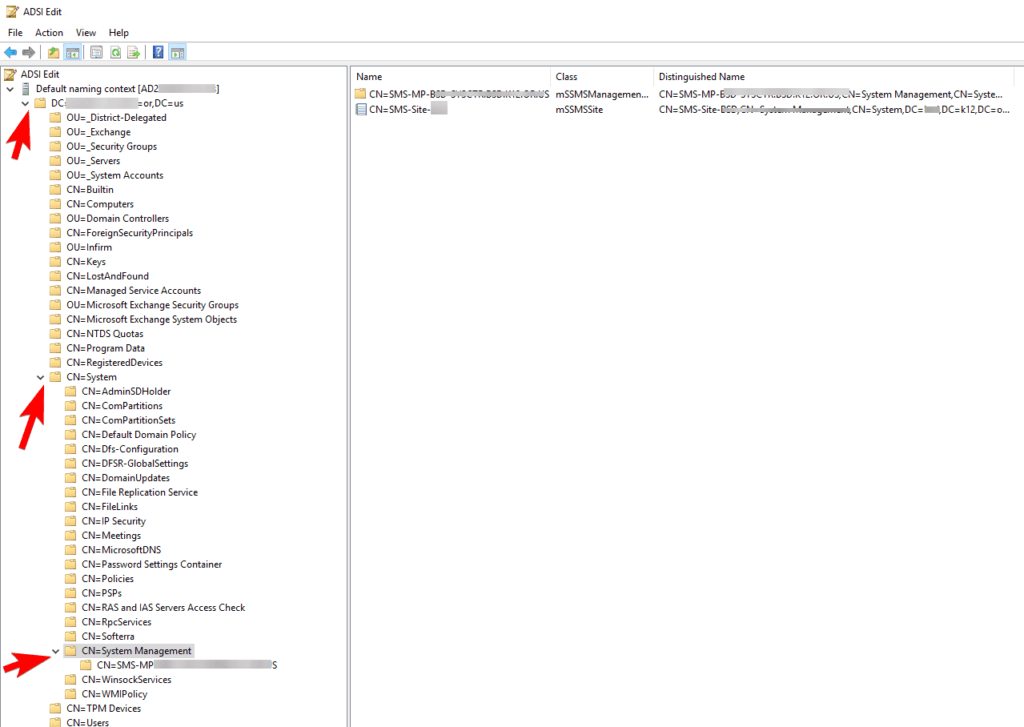
ADSI Edit | System Management Container
Assuming that you have a previous version installed, you should already have the necessary components in place. However, if they are missing, you’ll need to create them. In my case, I’m adding the new server alongside the old one, and will need to remove the old server once the migration process is complete. To accomplish this, I will need to modify the existing settings accordingly.
It’s OK to have more then 1 server in System Management with Full Access
Open up ADSIEdit, on your domain controller.
Expand the structure tree Domain > CN=System Management. You should see your existing server.
Right Click > Select Properties then select the Security tab.
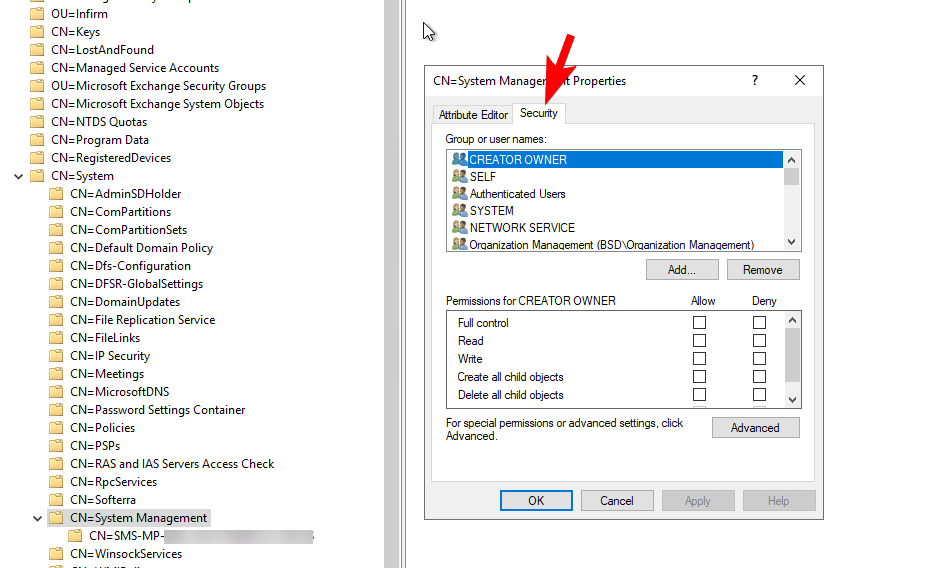
We need to Add our new server and Grant Full Control permissions. You need to change the object types to include computers. Hold off on clicking apply and and OK.
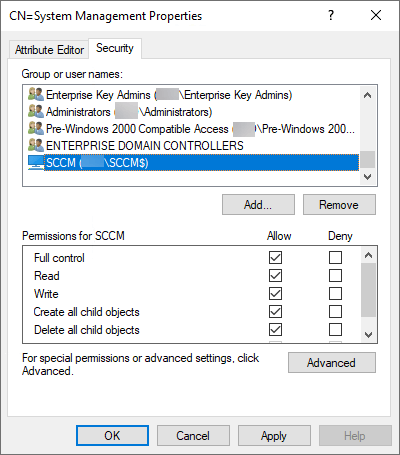
Click Advanced, double click the new server (SCCM$ for me) and change Applies to: This object and all descendant objects.

Done!
Install SQL Server 2019
Ideally, I would install this on a separate box rather than on my SCCM server. However, in our current setup, I don’t see any compelling reasons to do so. Our vSphere environment is equipped with all-flash storage, which means we should have sufficient resources to accommodate both applications without sacrificing performance. Therefore, I have decided to install it on my SCCM server.
Note: Great time to take a snapshot before we start installing incase you need to role back.
Open up the ISO we downloaded (SW_DVD9_NTRL_SQL_Svr_Standard_Edtn_2019Dec2019_64Bit_English_OEM_VL_X22-22109) and run the setup.exe file.
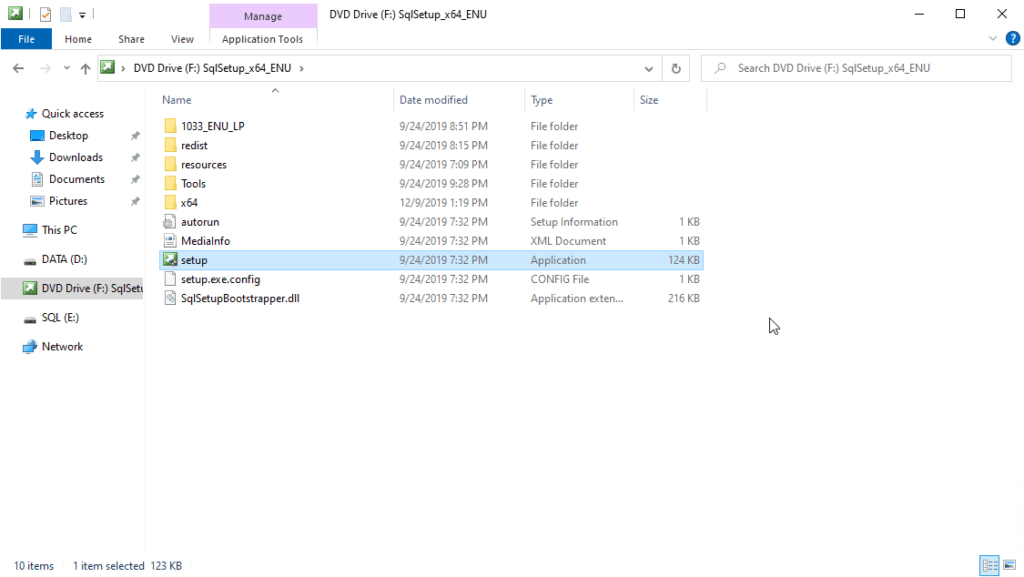
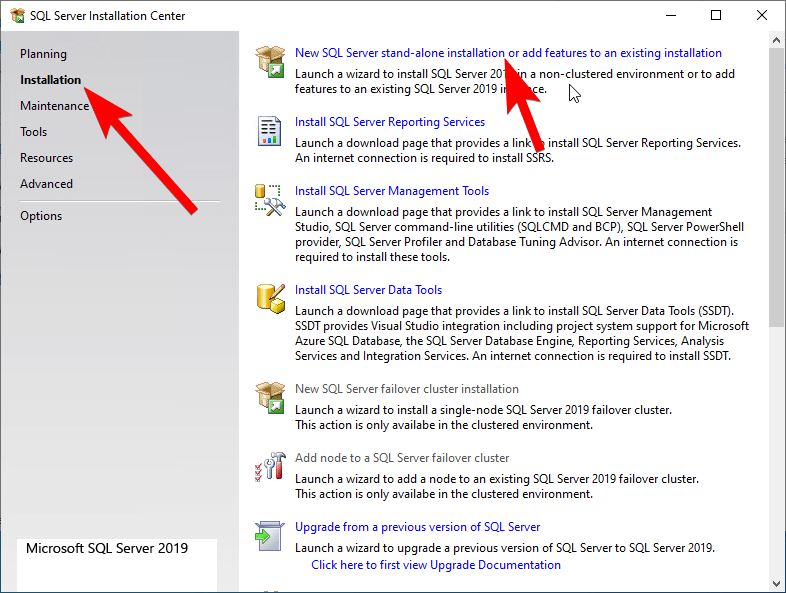
Select Installation then New SQL Server stand-alone installation or add features to an existing installation.
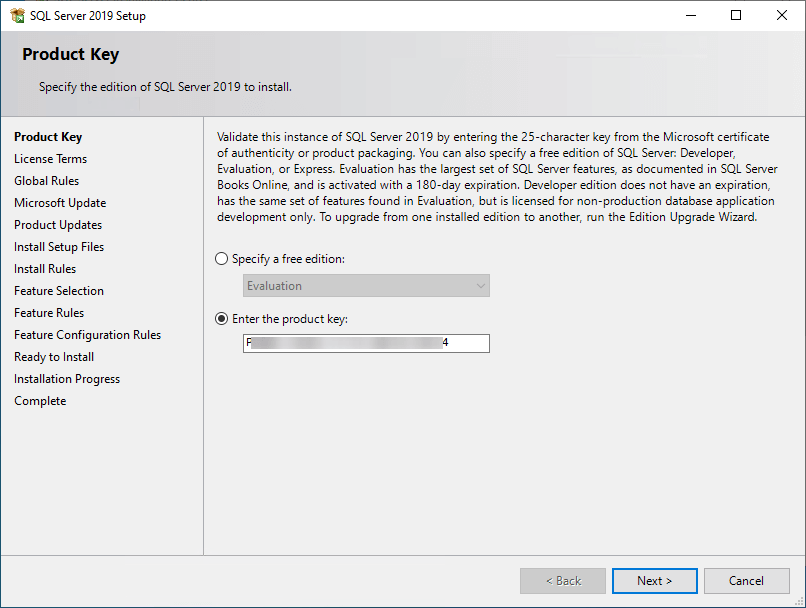
Next page is the Product Key page. Put in your license key in if you have one otherwise select evaluation. Next.
Go ahead and Agree to the license, and Use Microsoft Update to check for updates (recommended). Keep going until you get to the Install Rules page.
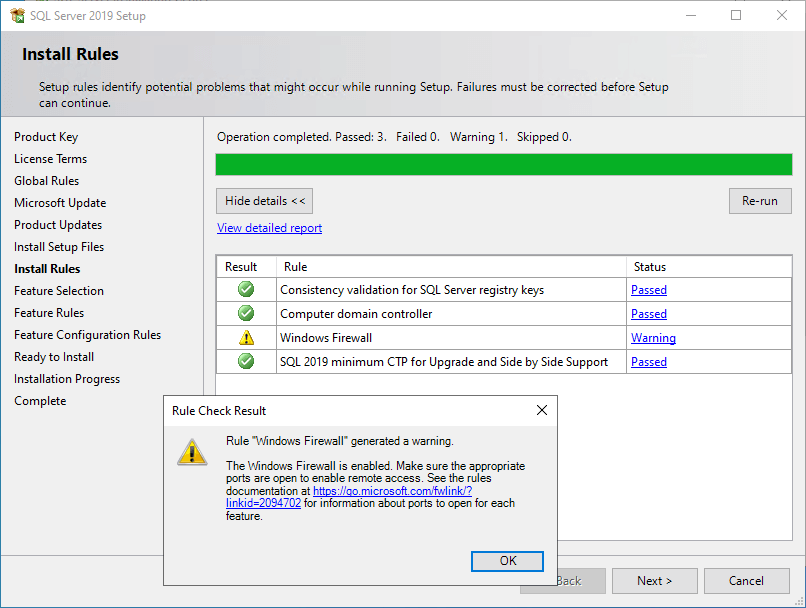
On the Install Rules page you’ll receive a warning about the Windows Firewall. You can see a list of the ports here. We’ll configure these in the next step.
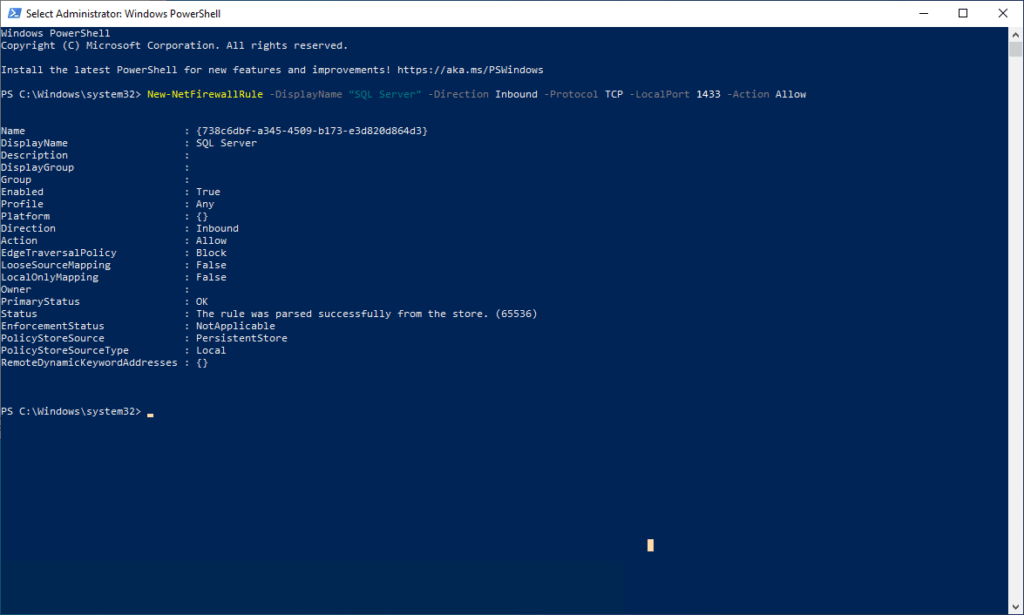
The necessary TCP / UDP ports required to pen are ports 1433,1434,4022,135. Lets configure these via PowerShell. Open Powershell (don’t forget to run as admin) and paste the following:
EDIT: Open up PowerShell ISE and paste the rules there. For some reason pasting them into PowerShell removes the quotes breaking the command.
New-NetFirewallRule -DisplayName “SQL Server” -Direction Inbound –Protocol TCP –LocalPort 1433 -Action allow
New-NetFirewallRule -DisplayName “SQL Admin Connection” -Direction Inbound –Protocol TCP –LocalPort 1434 -Action allow
New-NetFirewallRule -DisplayName “SQL Database Management” -Direction Inbound –Protocol UDP –LocalPort 1434 -Action allow
New-NetFirewallRule -DisplayName “SQL Service Broker” -Direction Inbound –Protocol TCP –LocalPort 4022 -Action allow
New-NetFirewallRule -DisplayName “SQL Debugger/RPC” -Direction Inbound –Protocol TCP –LocalPort 135 -Action allow
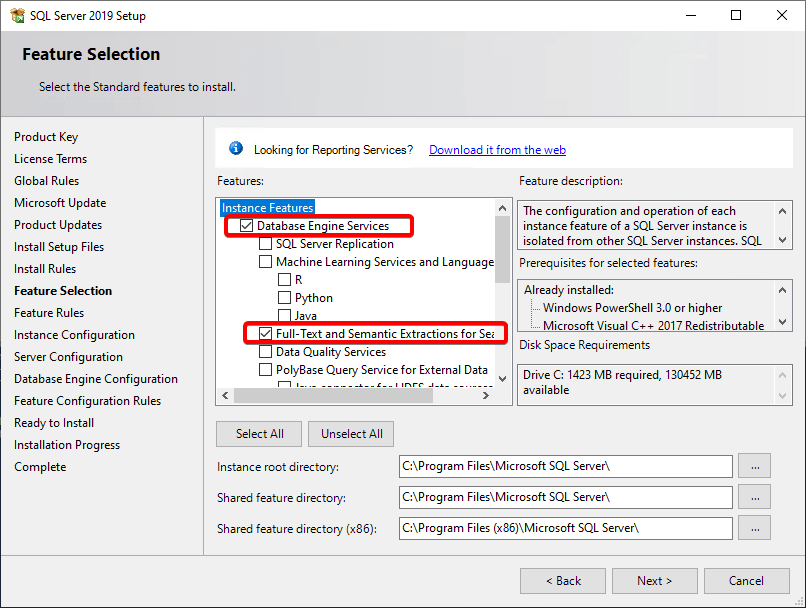
Next tab, Feature Selection, select Database Engine Services and Full-Text and Semantic Extractions
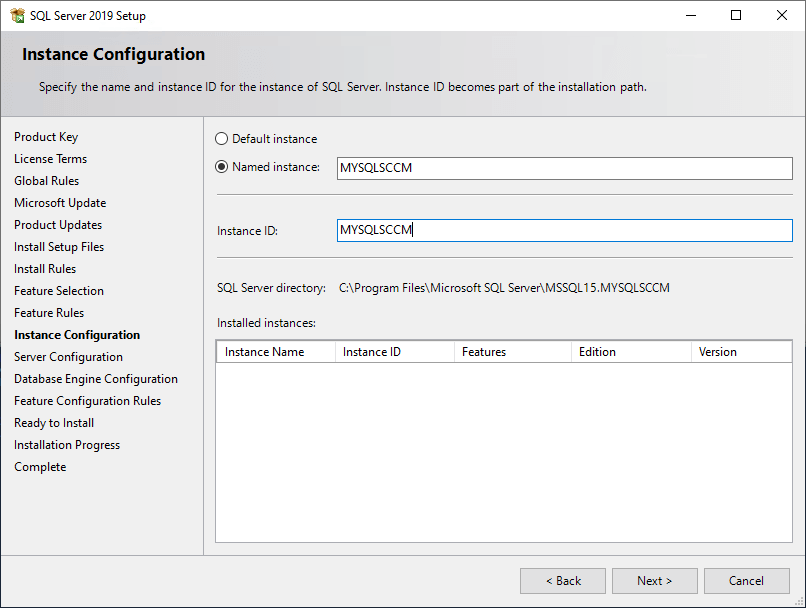
Now click next to Instance Configuration. You can leave this default but I’ll be changing it to to a more unique identifier. Named Instance will be set as MYSQLSCCM.
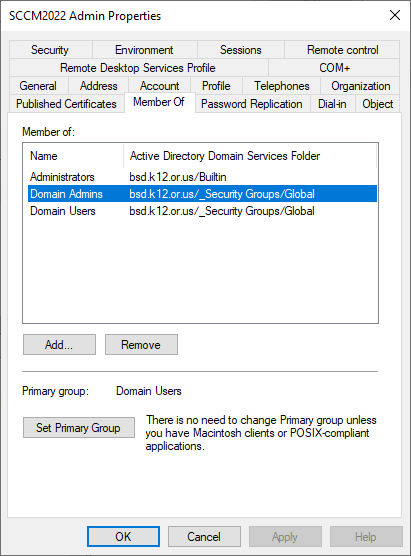
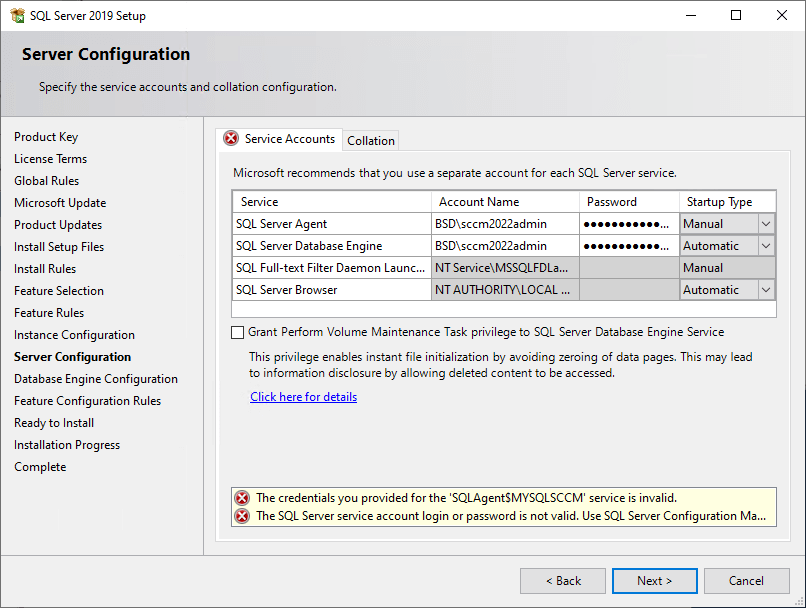
Server Configuration tab I’ll use a sccm service account. If you haven’t done so create one. This will be for the SQL server agent and SQL server database engine.
Be sure to add the service account to the Domain Admins and Administrators group.
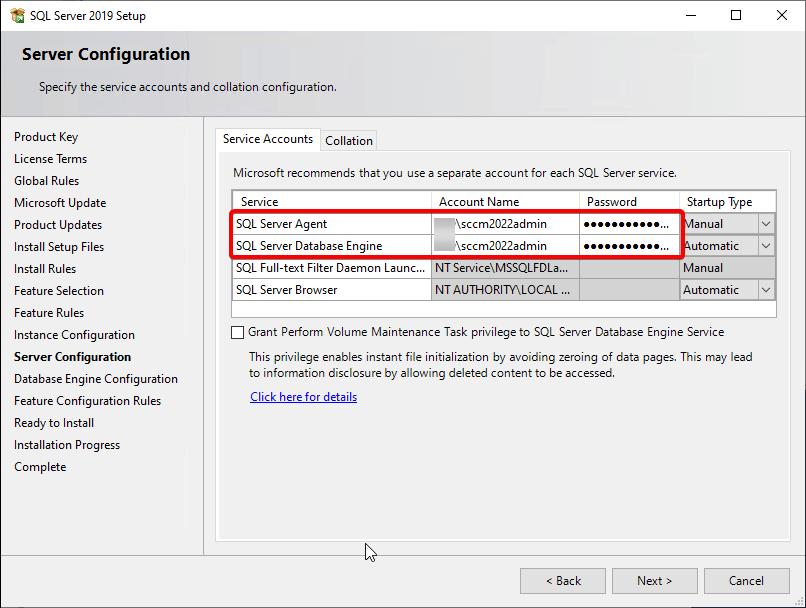
TIP: It’s Friday (I know shouldn’t be doing any changes on Fridays) but don’t forget when you create the service account to uncheck “User must change password on next login” Took me a bit to figure out why the account wouldn’t connect.
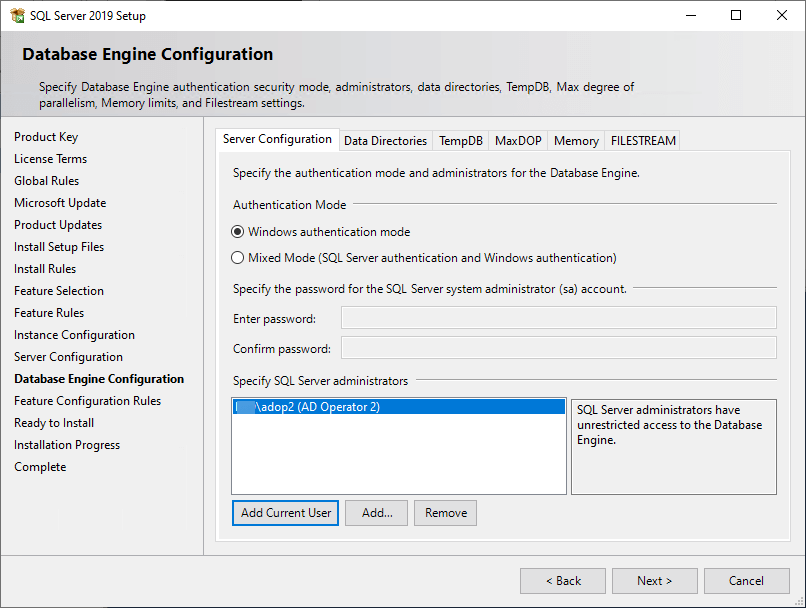
Next, for Authentication Mode, keep Windows authentication mode selected, and at the bottom click Add Current User. I’m also adding Domain Admins group.
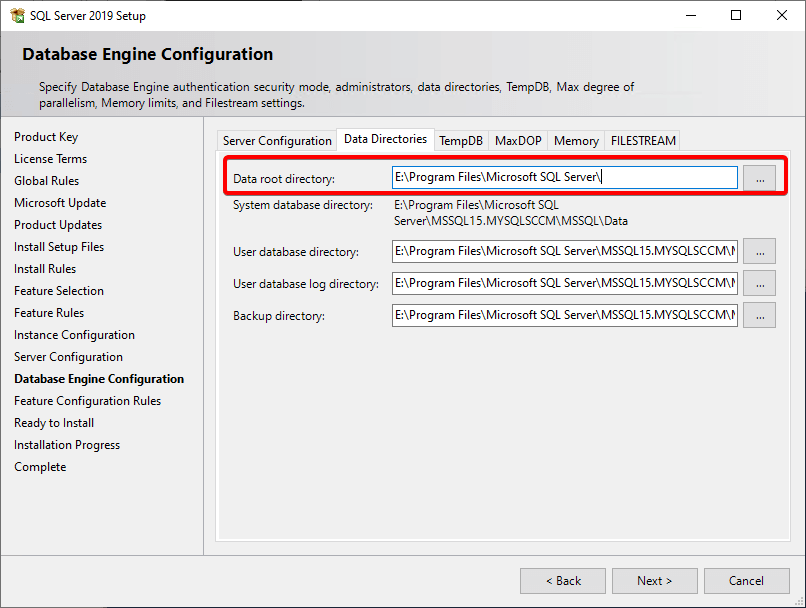
Data Directories tab we’ll change the Data root directory to the E Drive I created for SQL.
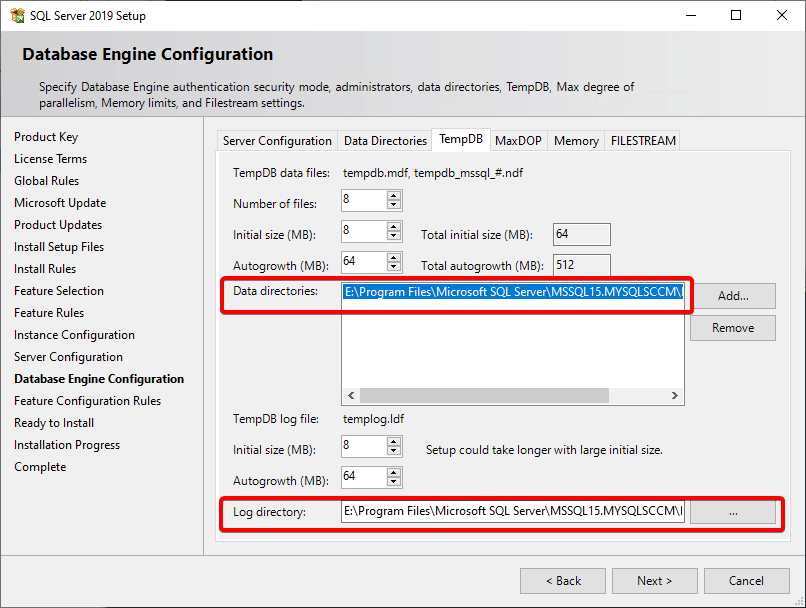
TempDB tab, double check to make sure it’s also pointing to E. It should of changed automatically.
Looks like we’re ready to install! Go ahead and click install. It will take a few minutes to complete.
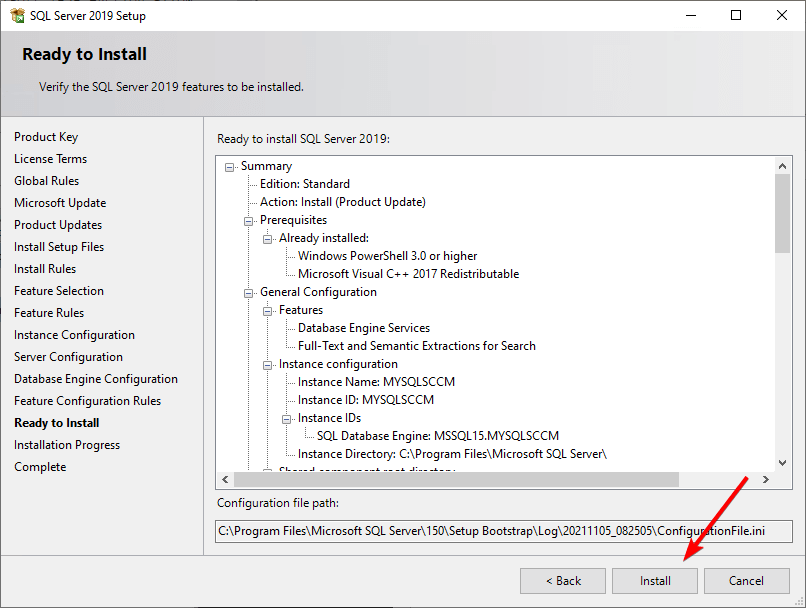
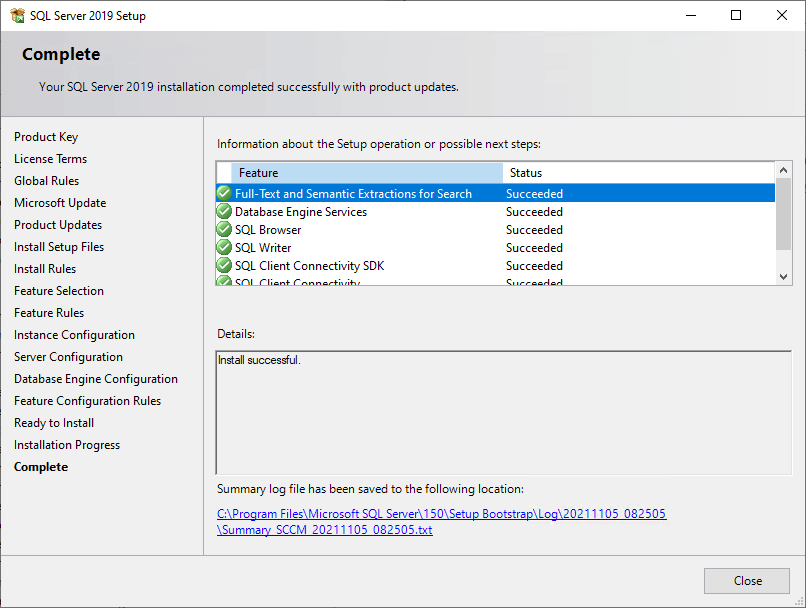
Looks like everything install correctly!
Tip: Taking another snapshot.

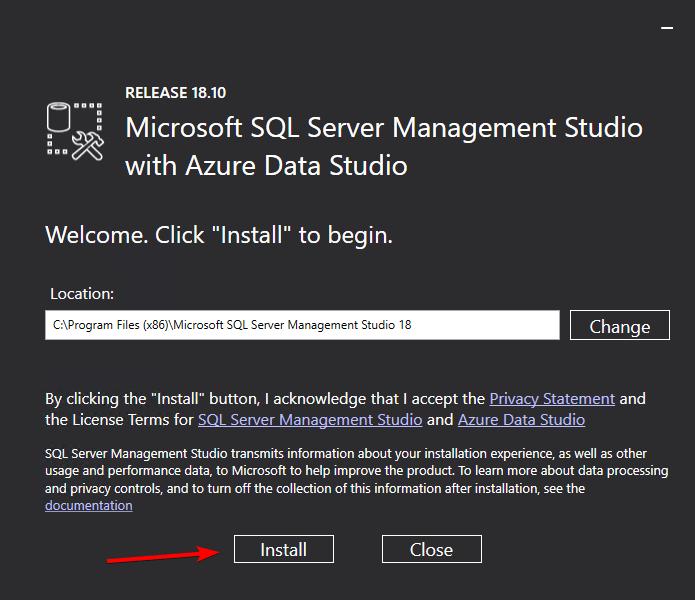
Install SQL Server Management Studio (SSMS)
Now we have SQL installed we need a way to view our databases. This is what SSMS does.
Run the file (SSMS-Setup-ENU) we downloaded earlier. Should only take a few minutes.
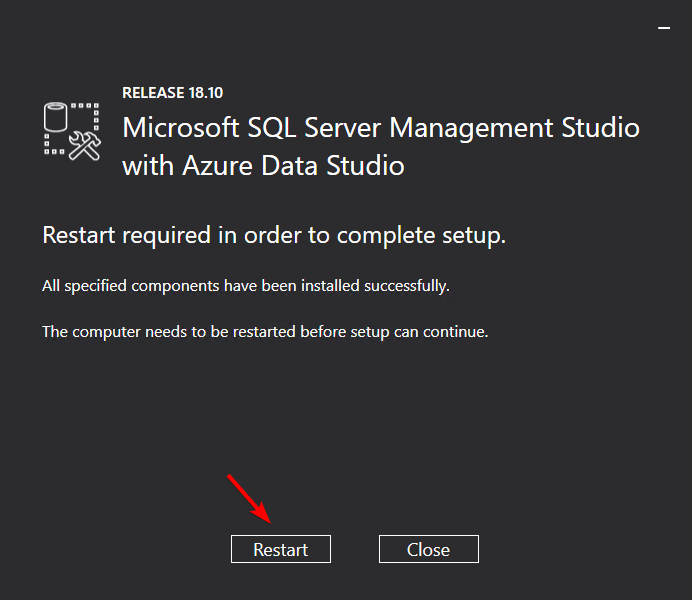
Once complete, reboot.
Install Windows ADK 11
Windows Assessment and Deployment Kit (aka ADK) consists of the tools designed to help deploy operating systems to the target.
Lets run adksetup.exe
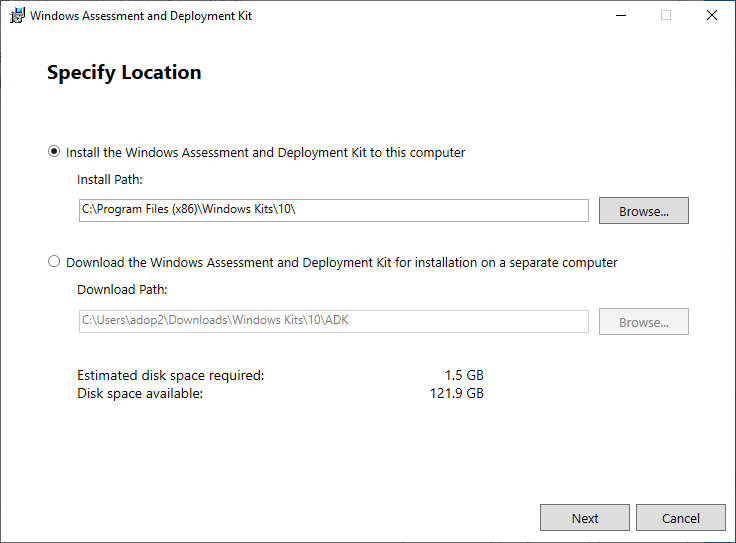
Click Next until you get to the Select the features you want to install screen.
Now make sure the following are selected.
- Deployment Tools
- Imaging And Configuration Designer (ICD)
- Configuration Designer
- User State Migration Tool (USMT)
- Windows Performance Toolkit
- Microsoft User Experience Virtualization (UE-V) Template
- Microsoft Application Virtualization (App-V) Sequencer
- Microsoft Application Virtualization (App-V) Auto Sequencer
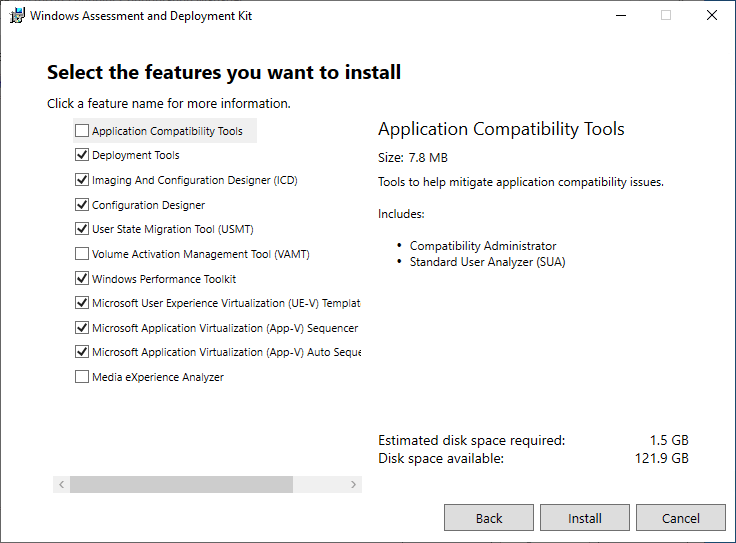
Let the install finish then move onto WinPE.
Install Windows Assessment and Deployment Kit Windows Preinstallation Environment Add-ons
Here is another critical piece to SCCM. ADKWinPE consists of the boot images required for operating system deployment (OSD). Let’s run adkwinpesetup.exe we downloaded earlier.
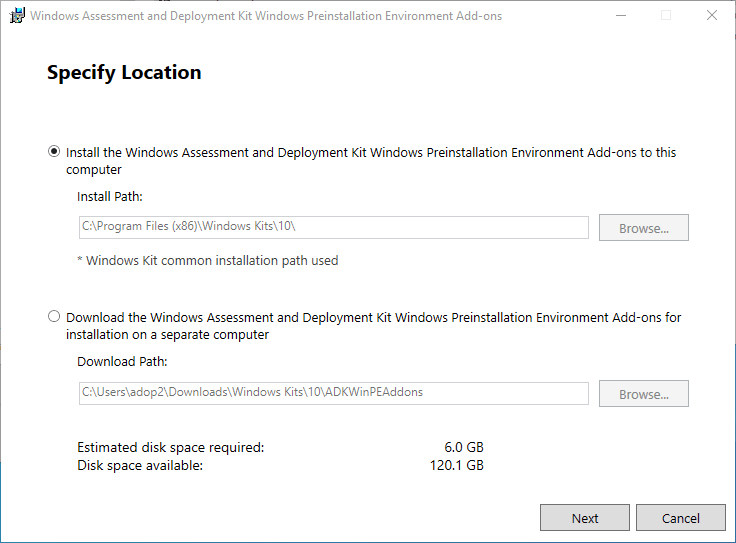
Click Next until you get to the Select the features you want to install section. Make sure Windows Reinstallation Environment (Windows PE) is checked.
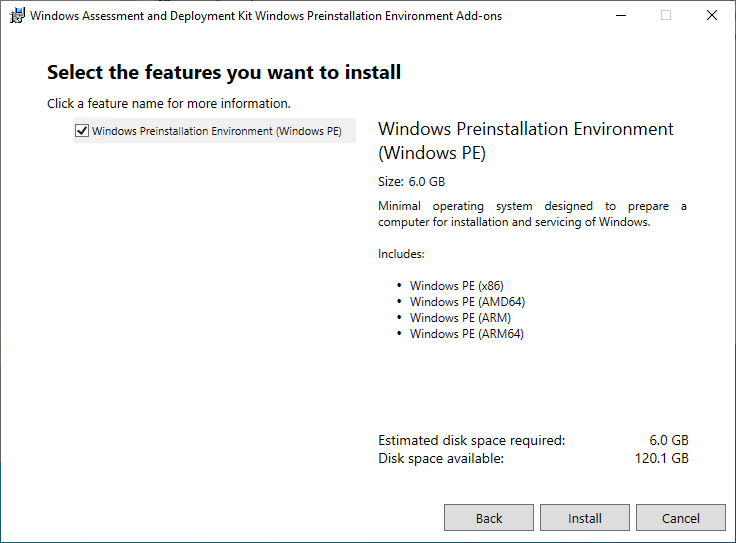
That’s it for WinPE.
Install SCCM Prerequisites
Now lets install the server roles necessary to install Configuration Manager Server.
On your SCCM server, open up Server Manager and click Add roles and features.
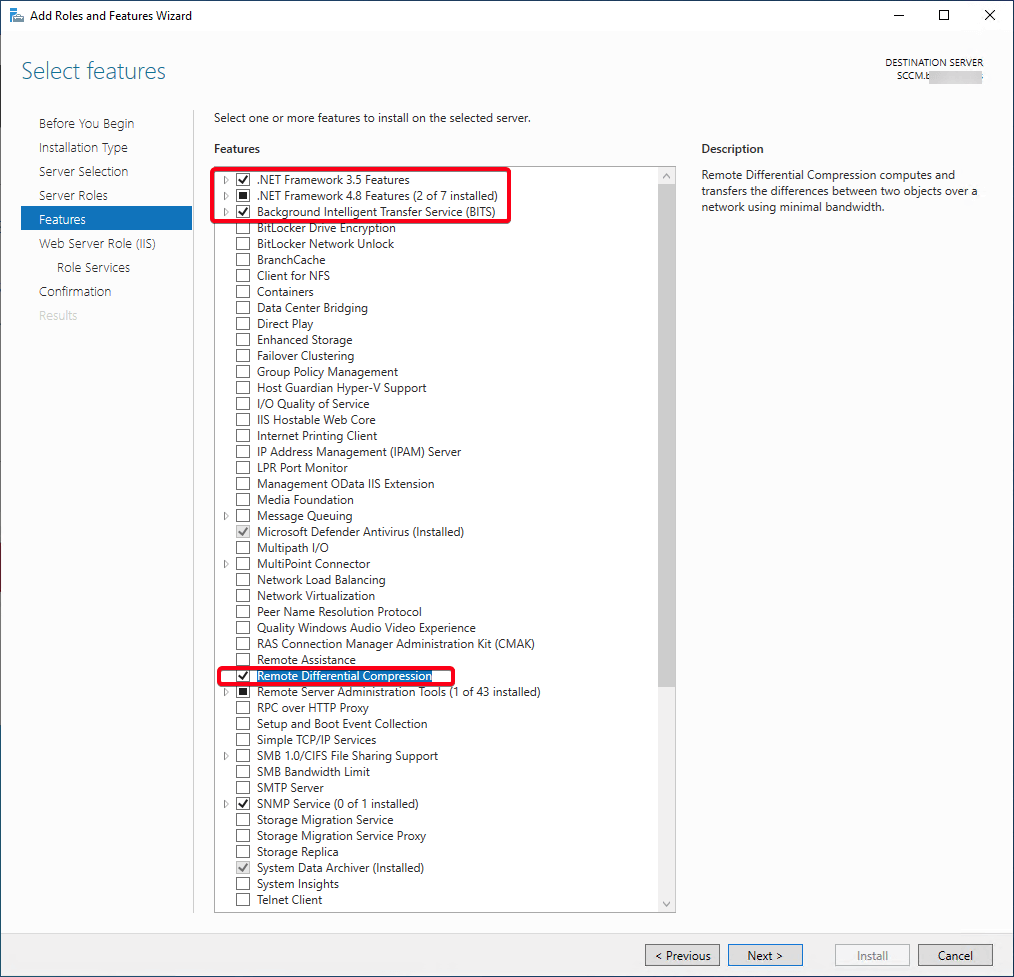
Select Features from the side bar. Enable the following:
- .NET Framework 3.5 Features
- Background Intelligent Transfer Service (BITS)
- Remote Differential Compression
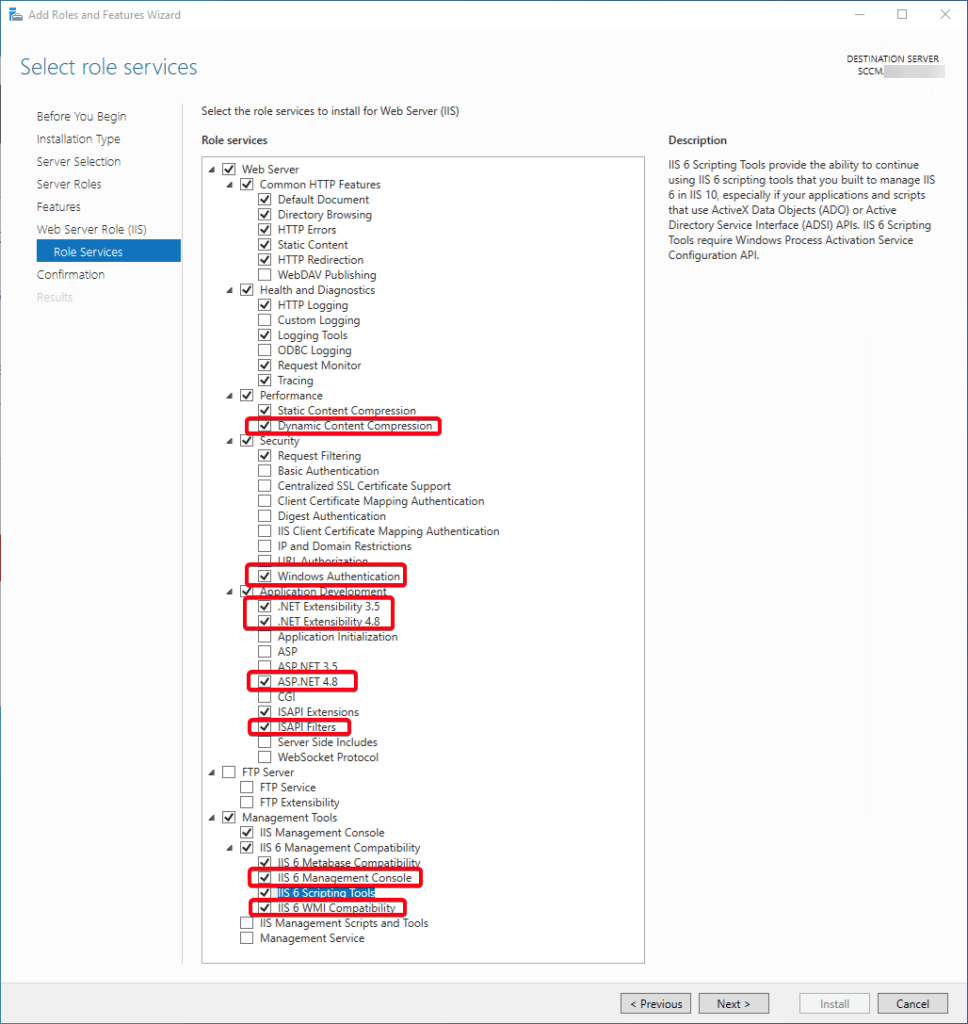
Select Next twice until you get to Role Services under Web Server Role (IIS). Make sure the following are checked.
- Performance
- Dynamic Content Compression
- Security
- Windows Authentication
- Application Development
- .NET Extensibility 3.5
- .NET Extensibility 4.8
- ASP.NET 3.5
- ASP.NET 4.8
- ISAPI Filters
- Management Tools
- IIS 6 Management Compatibility
- IIS 6 Management Console
- IIS 6 Metabase Compatibility
- IIS Management Scripts and Tools
- IIS 6 Management Compatibility
Once complete we’ll move onto SCCM.
Block SCCM Access to C:\
ConfigMgr you can create a file called NO_SMS_ON_DRIVE.SMS. This prevents site system role component installation on the drive you place it in. You can find more great info on this here.
Open up Notepad (run as admin) and click Save As. Leave the file black. Save the file name as NO_SMS_ON_DRIVE.SMS. To achieve this don’t forget to change the Save as type: to All types.
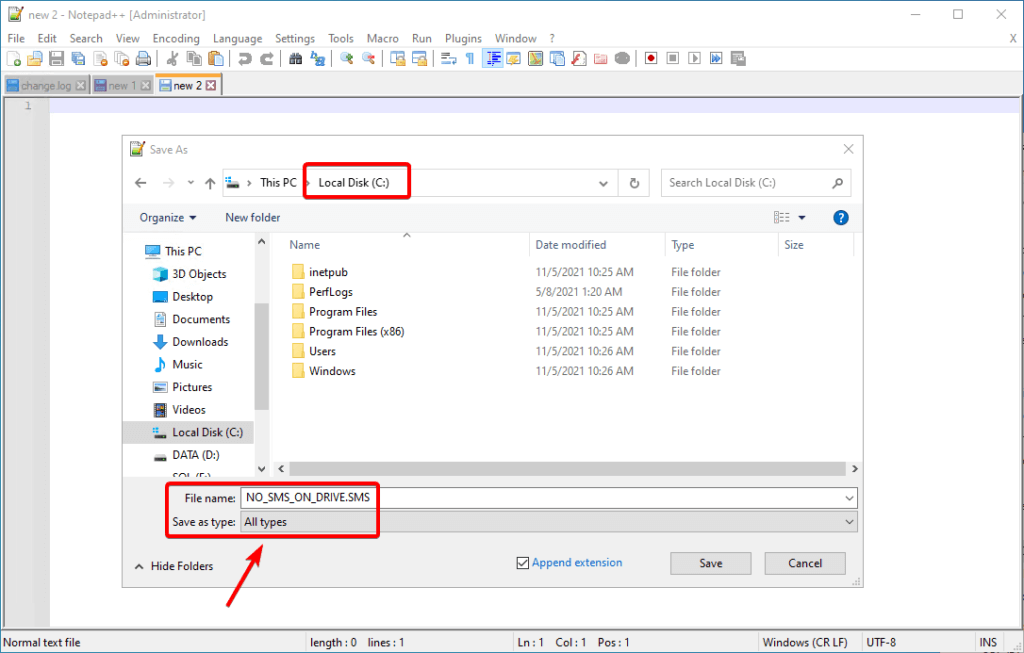
Repeat this for the SQL drive we created also.
Tip: It’s been awhile since we did a snapshot right? Why not do another one? It’s free!
Install Configuration Manager
Now to really get our hands dirty! Lets install Microsoft Endpoint Configuration manger! I downloaded this earlier via VLSC (Volume Licensing Service Center) but you can use the link near the top to download an evaluation copy, good for 180 days.
Double click to open and mount SW_DVD5_MEM_ConfigMgrClt_ML_2103_MultiLang_ConfMgr_MLF_X22-62366.iso.
Run splash
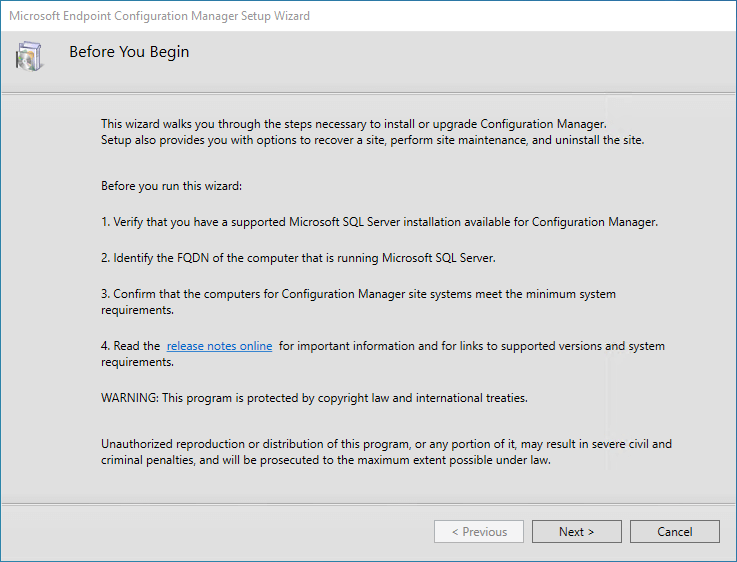
The Microsoft Endpoint Configuration Manger wizard will start. Click Install.

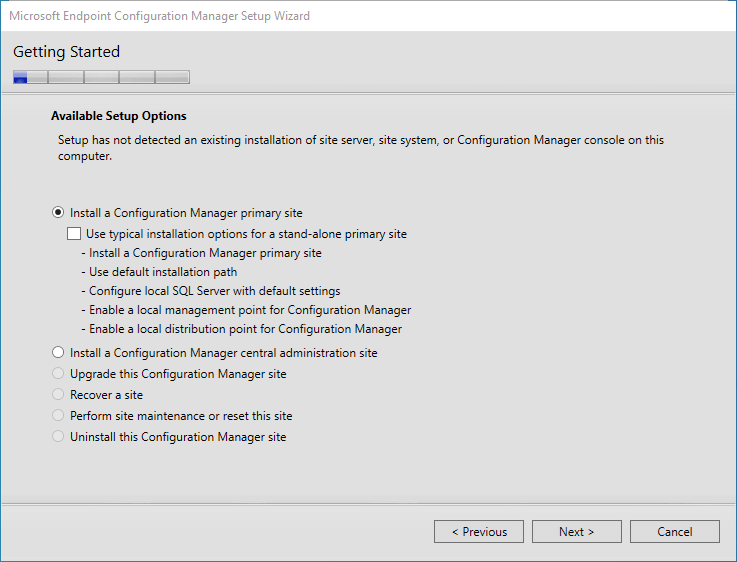
Let’s begin
For my setup since I’m just replacing my existing server and starting over I’ll be selecting the first option, Install a Configuration Manger Primary Site.
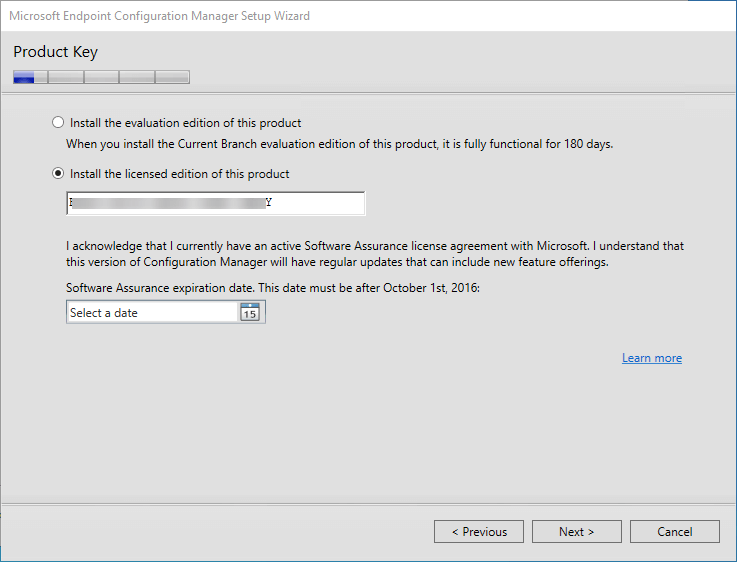
Now the Product Key page, I’m going to install my key. You can select the evaluation edition if you don’t have one.
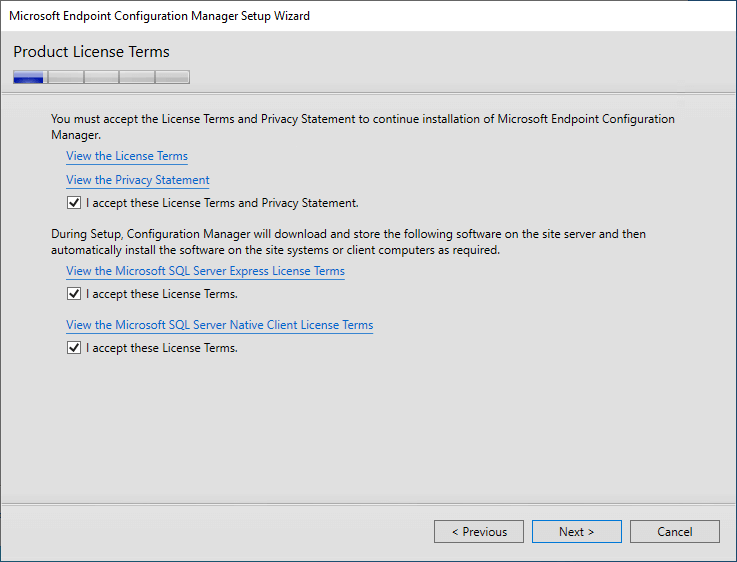
Accept all those lovely license terms. Don’t forgot to read them all 😉
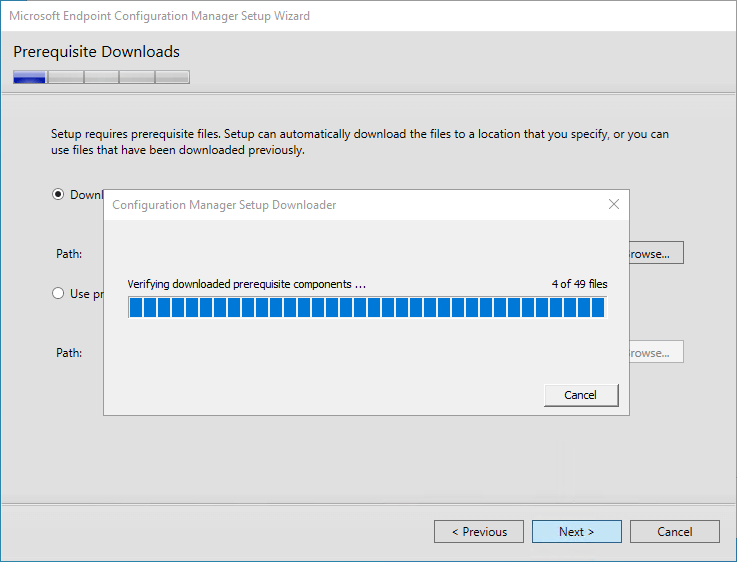
Prerequisite Downloads, I’ll just set this to my D: DATA drive. Make a new folder D:\prerequisite_downloads.
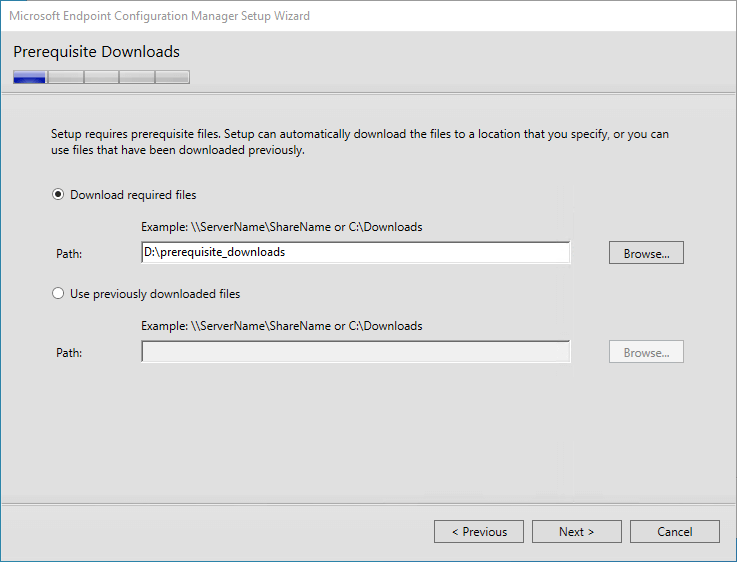
Wait for the downloads to finish.
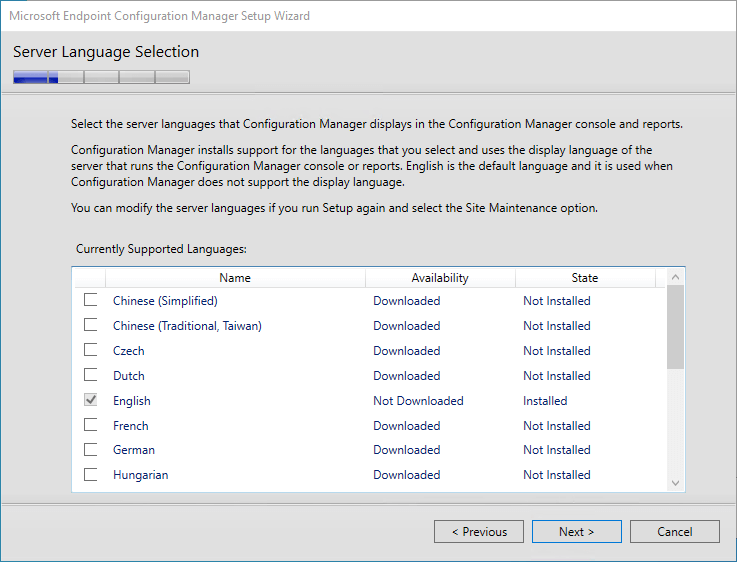
Server Language Selection, choose which ever you require. Do the same for the Client Language Selection.
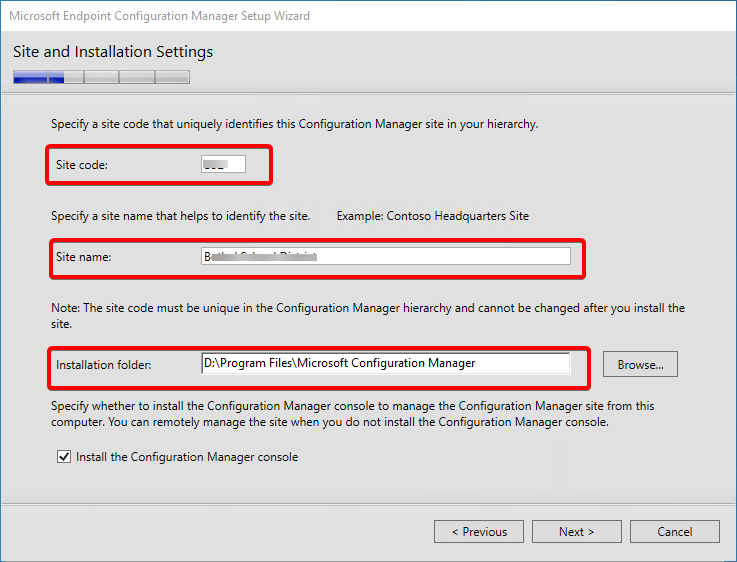
Site and Installation Settings we need to specify the following: Site Code, Site Name, and Installation folder. The site code can only be 3 characters/numbers. Since I have an existing system, it must be different then my previous site. This will avoid a lot of headaches.
Change the default Installation folder to the D: drive.
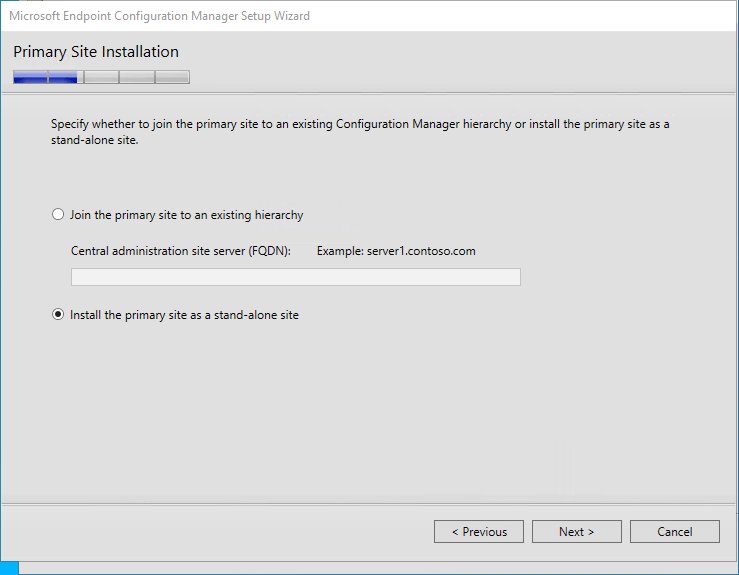
Primary Site Installation, I’m treating this a primary stand alone.
Database Information, set the Instance Name to the one we created earlier. (MYSQLSCCM)
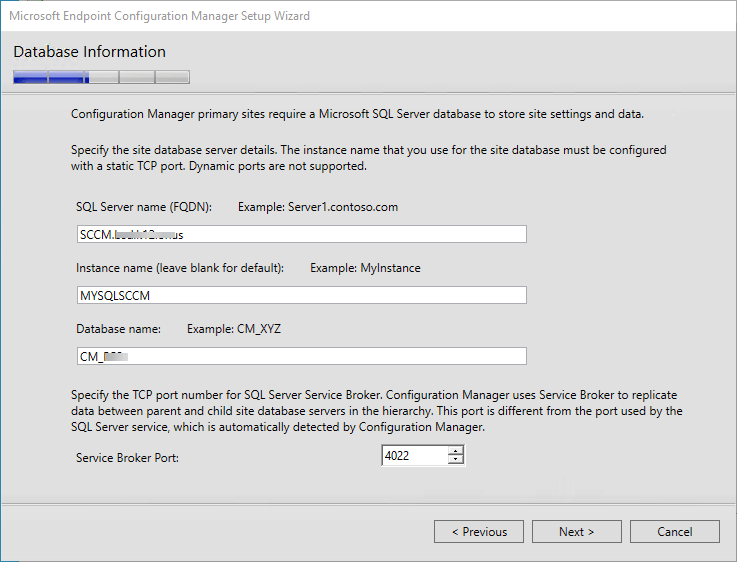
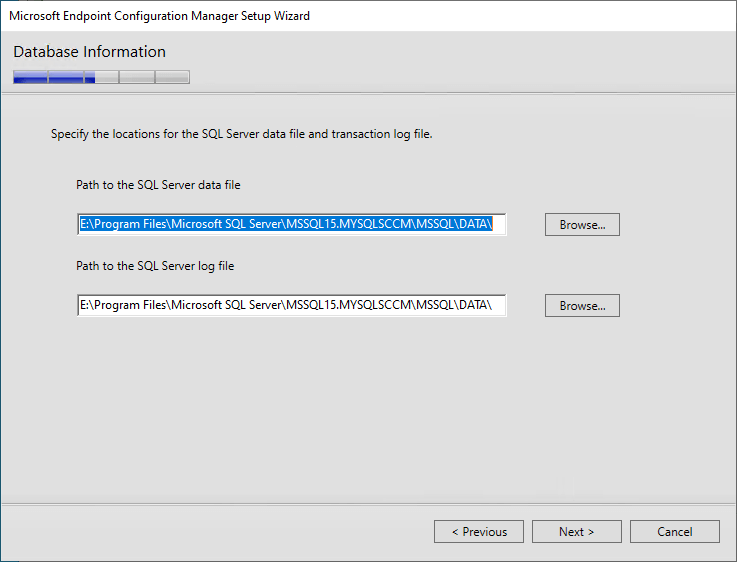
Database Information, looks like it automatically remembered we’re using our E:.
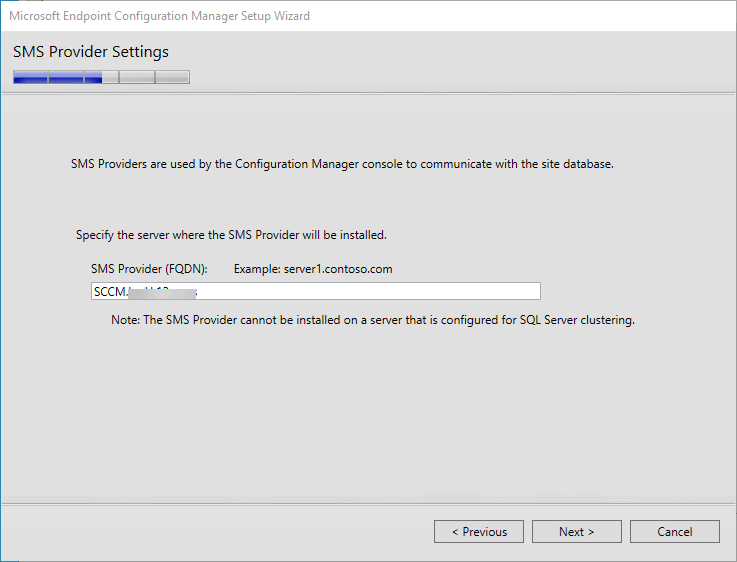
SMS Provider Settings is the FQDN of the server we’ll be using. Should of auto populated for you.
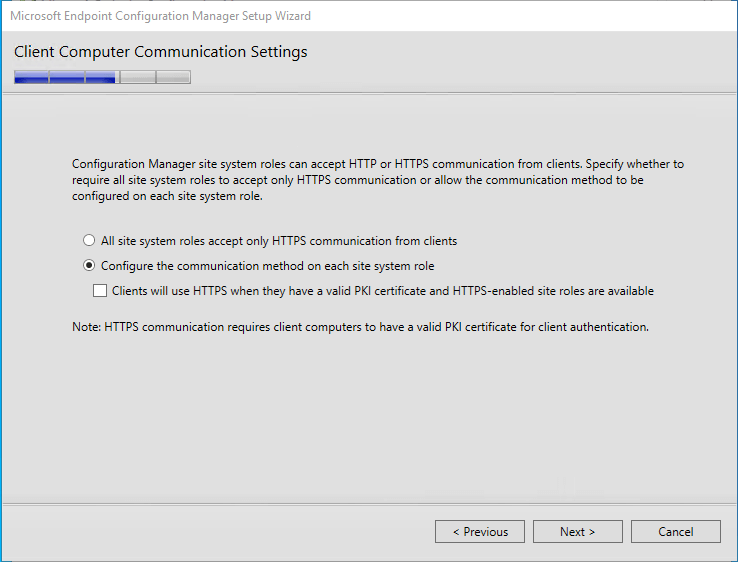
Client Computer Communication Settings – We will select Configure the communication method on each site system role, then Next.
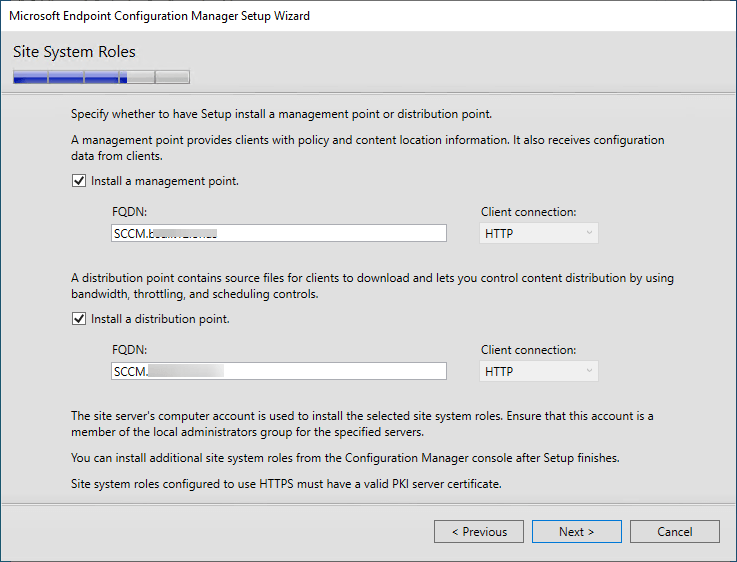
Site System Roles, make sure both boxes are checked.
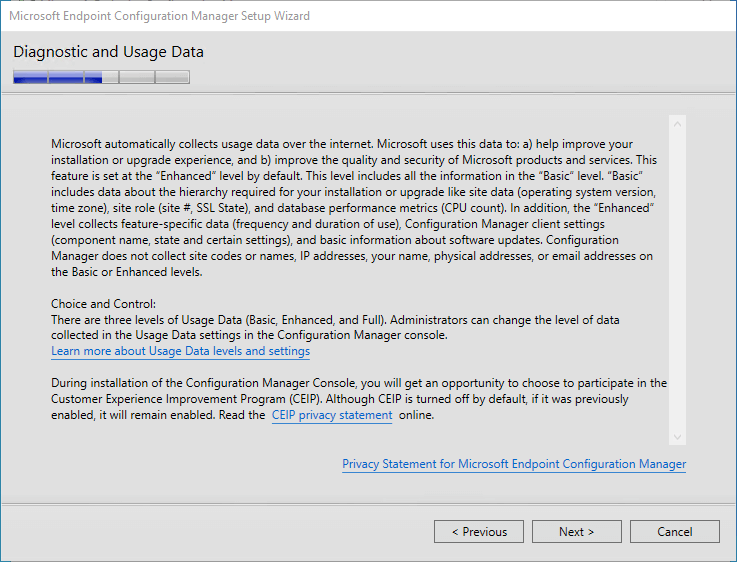
Read the Diagnostic and Usage Data page. 😉
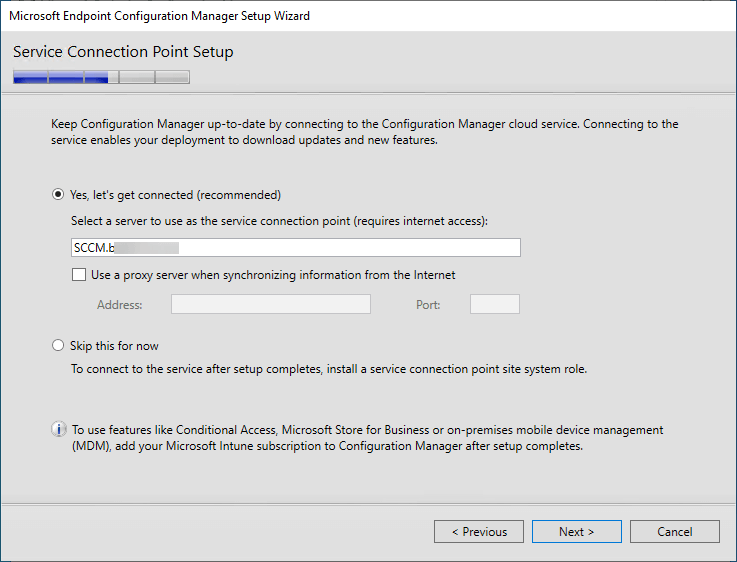
Service Connection Point Setup, by default Yes, Let’s get connected (recommended). Next.
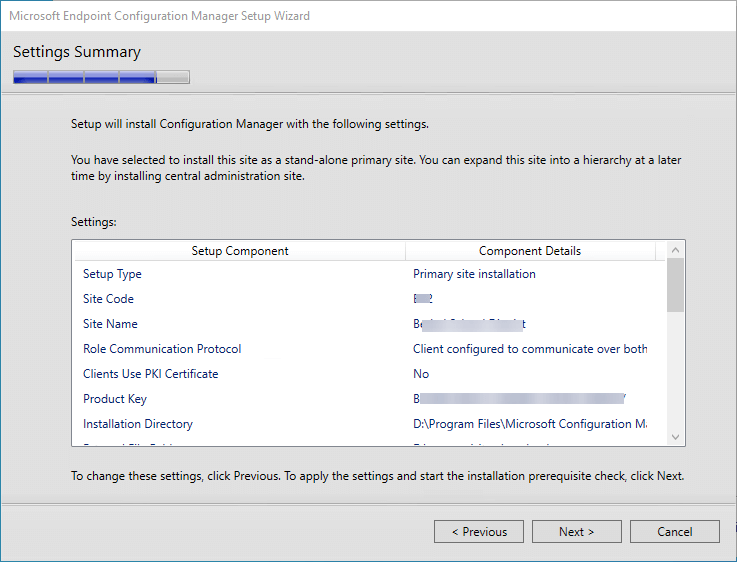
Settings Summary, take a look and make sure everything looks correct. Then click Next.
Prerequisite Check, this will take a little bit to run. Once it’s complete make sure nothing has Failed. If anything has you need to correct it.
I’ve corrected everything except for WSUS. I’m going to ignore this as I won’t be using SCCM to manage windows updates.
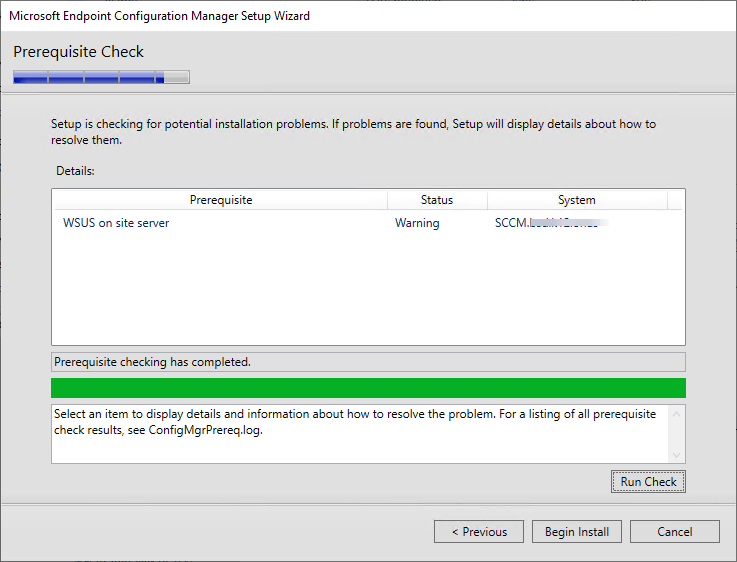
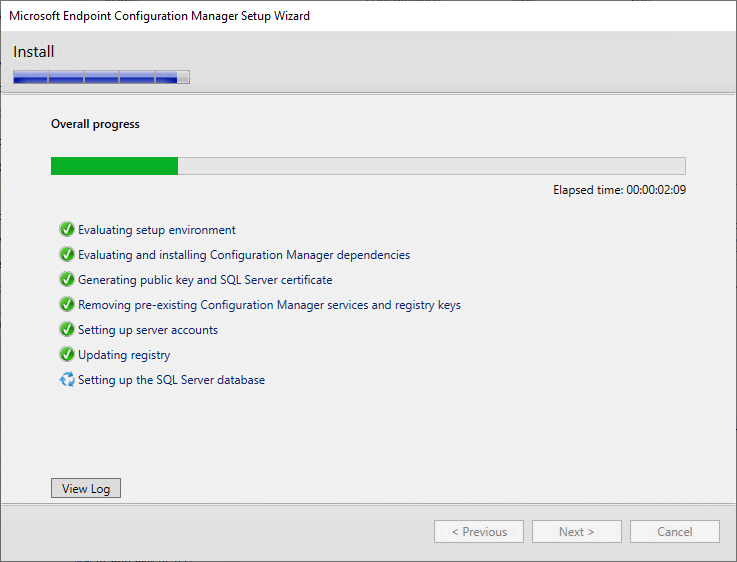
Let’s click Begin Install.
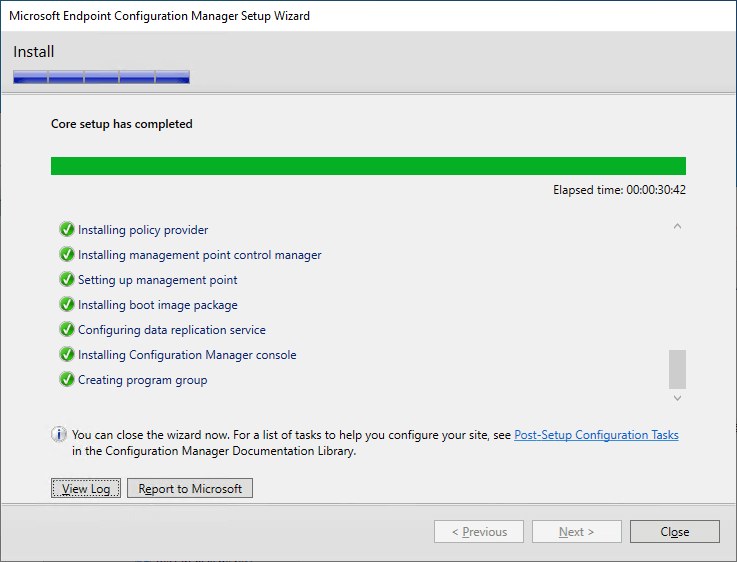
Done!
Remember as your setting up the new instance, don’t have overlapping boundaries!

Tip: Don’t forget to remove all the snapshots we took.
- After you’re done building out your server:
- Remove previous server from ADSI System Management
- Update your PXE Boot Options in DHCP (Option 066 Boot Server Host Name) to the new IP.
![Active Desktop – Restore [Windows XP]](https://www.coryfiala.com/wp-content/uploads/2013/01/Active-Desktop-Recovery-e13596714771581-1024x454.jpg)