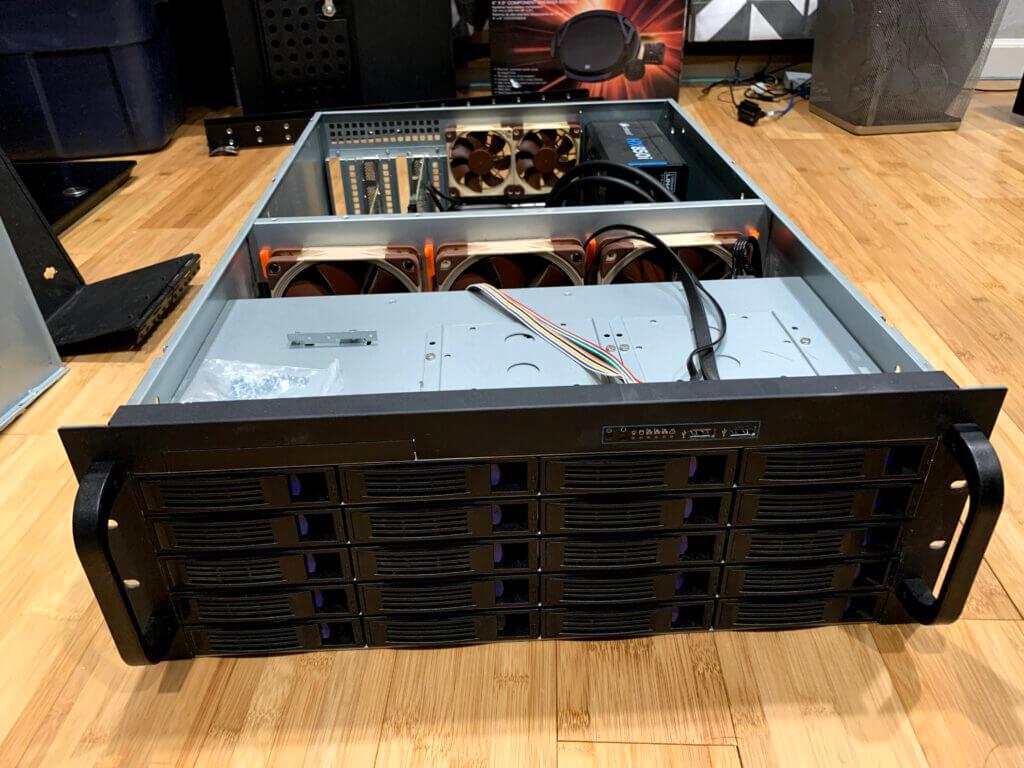
Today I successfully migrated my UNRAID server to my new ESXi host. For a little background, I did this for 2 reasons. I want to get familiar with ESXi for work and the second reason was to consolidate my homelab. Figured after I scored two CSE-846 chassis off craigslist for $100 it’s a perfect time!
So the good stuff. Below is my parts list of before and after. Some items I transferred over and others I purchased off eBay or /r/homelabsales. The only other parts missing are hard drives. I’ve been picking up 8TB and 10TB drives when they go on sale. Really hard to pass for $130 or $160 respectfully. As of this writing, I’m at 10x 8TB and 2x 10TB drives.
My Old Setup
UNRAID was running bare metal
- Norco 4u 20 Hot-Swappable Chassis (RPC-4220)
- Asrock Taichi Ultimate Z390
- Intel i9-9900k
- 32GB (2x16GB) G.Skill DDR4 3000
- PNY Quadro P2000
- Corsair HXi Series 850W Platinum Plus
- Thermaltake Water 3.0 Ultimate CPU Cooler
- Samsung 970 Evo m.2 1TB Gen3
- Samsung 860 Evo 2.5 1TB
- 3x Noctua NF-F12 120mm PWM (fan wall)
- 2x Noctua NF-A8 80mm (rear)
- LSI 9211-8i Flashed to IT Mode
- LSI-9201-16i flashed to IT Mode
The New Setup
ESXi is bare metal with UNRAID has a VM.
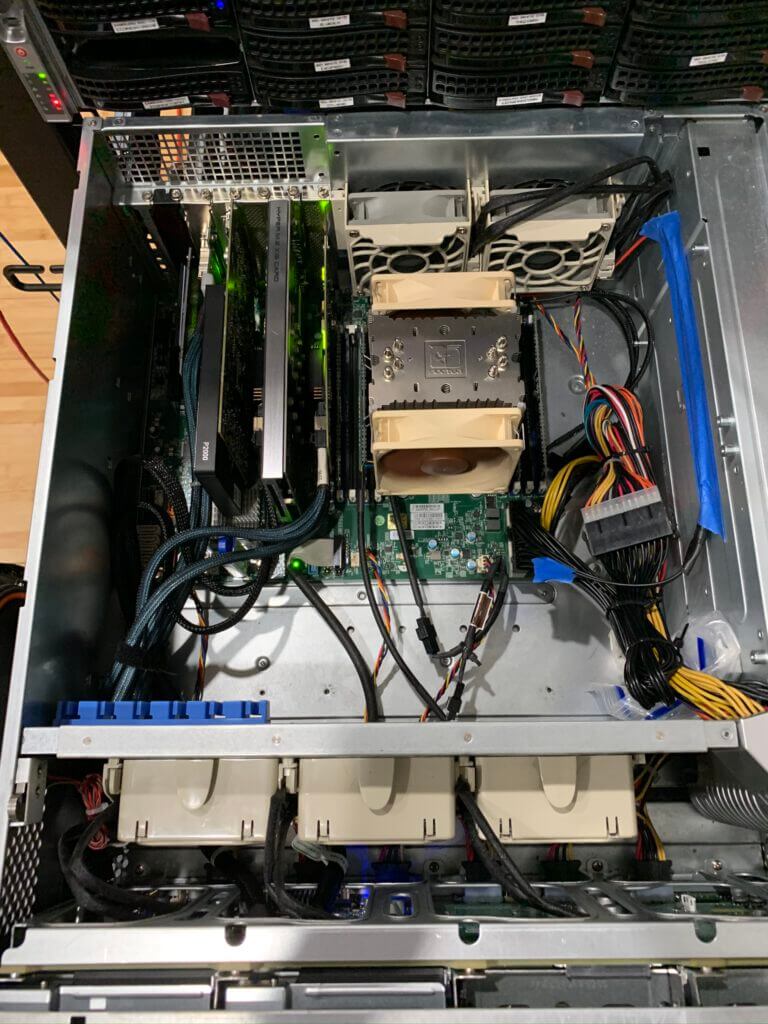
- 2x SuperMicro CSE-846 Chassis
- Upgraded both backplanes to BPN-SAS2-846EL1
- Upgraded PSWs to PWS-920P-SQ
- Replaced all fans with Noctua NF-R8’s
- Purchased SuperMicro JBPWR2 REV 1.0 Power Board for Unraid (you’ll see why later)
- SuperMicro MBD-X10SRL-F
- Intel Xeon E5-2680v3
- Noctua NH-U9DX i4
- 128GB DDR4 (4x 32GB) SK Hynix HMA84GR7MFR4N-TF
- PNY Quadro P2000
- Samsung 970 Evo m.2 1TB Gen3
- Samsung 860 Evo 2.5 1TB
- 2x WD Black NVMe SN750’s 500GB (Killer deal couldn’t pass up)
- Generic M.2 NVME to PCIe 3.0 x4 Adapter
- Asus Hyper M.2 x16 PCIe 3.0 x4 Expansion Card V2 (Supports 4 NVMe m.2 drives) Turns out my board can’t support all 4 so only running 2.
- 2x Mini SAS SFF-8088 to SFF-8087 Adapters
- 2x External Mini SAS SF-8088 Maile to SFF-8088 Male Cables
- 2x LSI 9211-8i (Only 1 in IT Mode)
Some things to think about
So I’ve been tinkering around with UNRAID in ESXi for a few weeks (thankfully I have a spare machine) before I do the migration. During this time there were a few issues I didn’t think about until I tried to roll out a test server.
- Powering the 2nd chassis for UNRAID Drives. It would be great to be able to sync the power supplies. If I turn on the main chassis, turn on or off the 2nd one automatically. This way I didn’t risk booting up a VM etc when the drives weren’t available.
- Drive passthrough. Because I’ll have some production VMs with UNRAID I can’t pass through my RAID card without losing access to all my drives for my other VMs
- How to boot UNRAID via flash drive.
So how did I overcome these 3 issues?
- I purchased some power supply splitters. Turns out there is a pin called “PS-ON”. This pin allows a motherboard to remotely control the power supply. So simple solution was to just but some extra wire and extend the 2 wires from the splitter to the other chassis.
- Drive passthrough was solved by utilizing 2 – LSI 9211-8i cards. One in IT mode passthrough to the UNRAID VM and the other in standard mode for VMs.
- plopkexec is an easy answer here.
The Great Migration
Here are the steps I took.
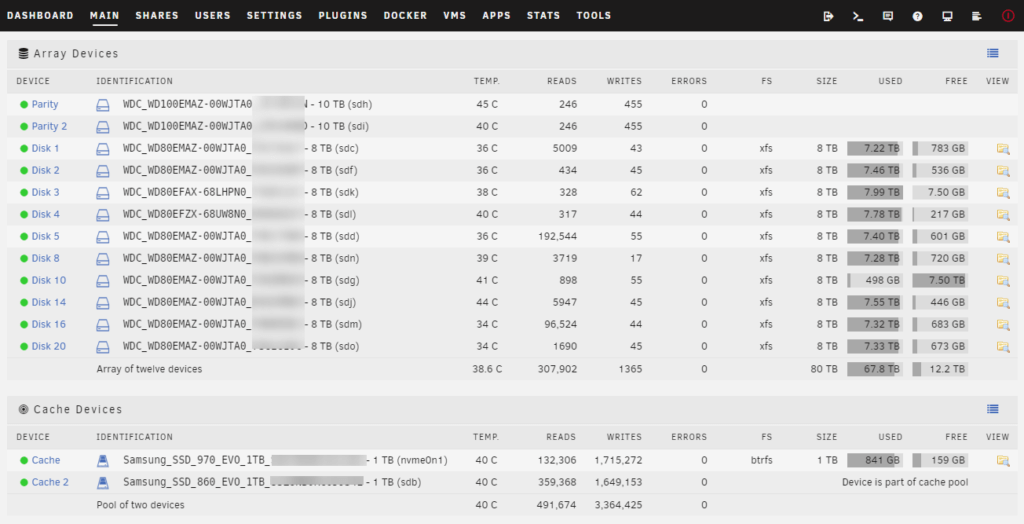
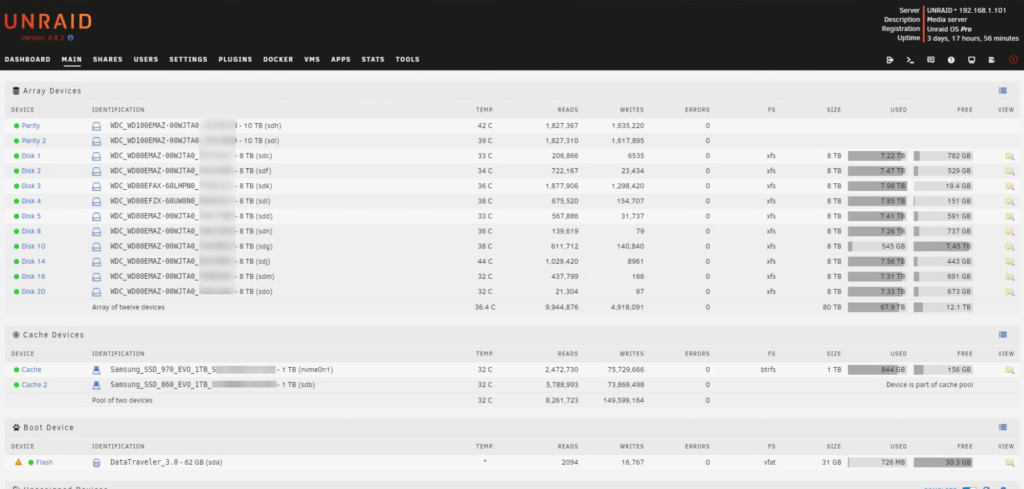
- Screenshots of everything in UNRAID. Disk layouts, docker page with advanced view enabled (shows all your paths and ports), plugins
- On the Main page in UNRAID click Flash under boot devices (your flash drive) and do a backup. It may take a while.
- Shutdown the machine.
- Migrate your hardware to your new machine. Flash drive, HDDs, SSDs, Video Cards, HBAs, etc.
- Boot up your ESXi host.
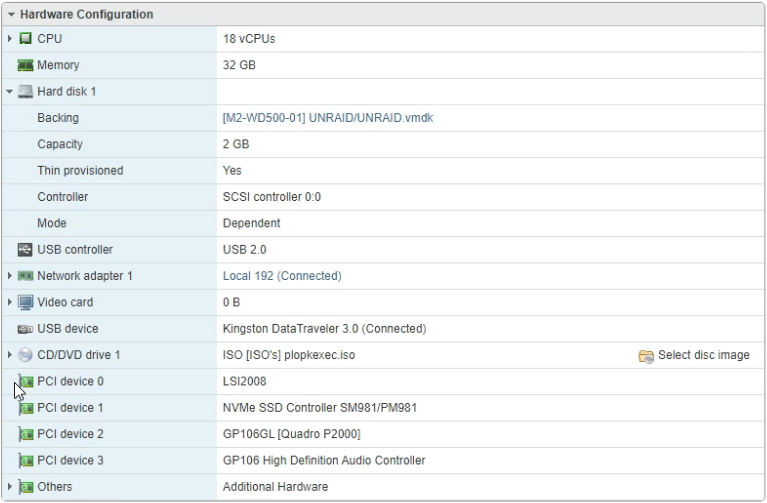
- Passthrough any devices you need to such as P2000, HBA card for UNRAID only, m.2 adapter and reboot the host. This can be done under Host > Manage > Hardware > PCI Devices
- Create a new virtual machine with a 1 or 2 GB drive and the amount of allocated ram and CPU you want to feed it.
- For the guest OS family and version, I selected Ubuntu Linux (32-bit)
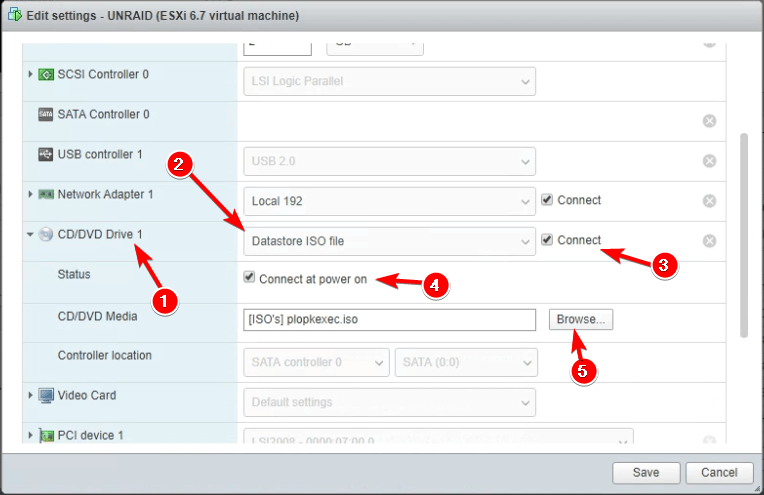
- Edit the CD/DVD Drive1 and change the option to Datastore ISO file and select the plopkexec you downloaded. You’ll need to upload it now if you haven’t already.
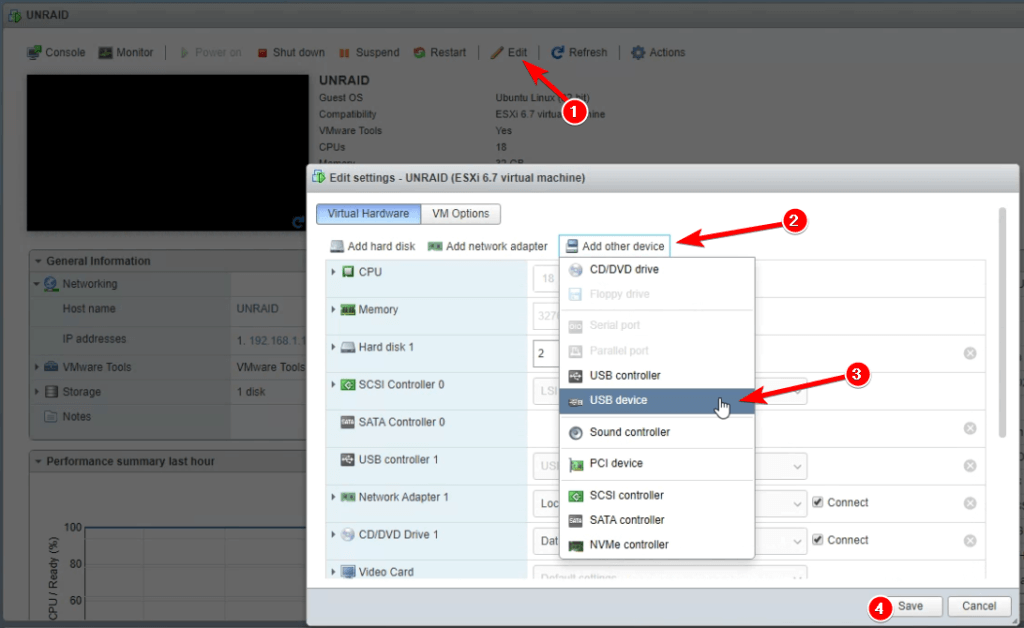
10)Add your UNRAID Flash dive to be accessible to the VM.
11) Do the same thing but for all the devices you passed through earlier via Add other devices > PCI Device
12) Startup the UNRAID VM. It may take a little longer to boot but should boot right up!
13) Before you start the array make sure all your drives are exactly in the same drive numbers from your screenshots of the array. Failure to do so especially the parity drives will result in loss of data!
Enjoy the freedom of being able to add more VMs!