I couldn’t find an updated how to article on setting up NetXMS on a windows server so thought I would write one. If you weren’t aware NetXMS is a network and infrastructure monitoring and management system. It’s a lot like netdisco if you’ve ever used that.
Requirements
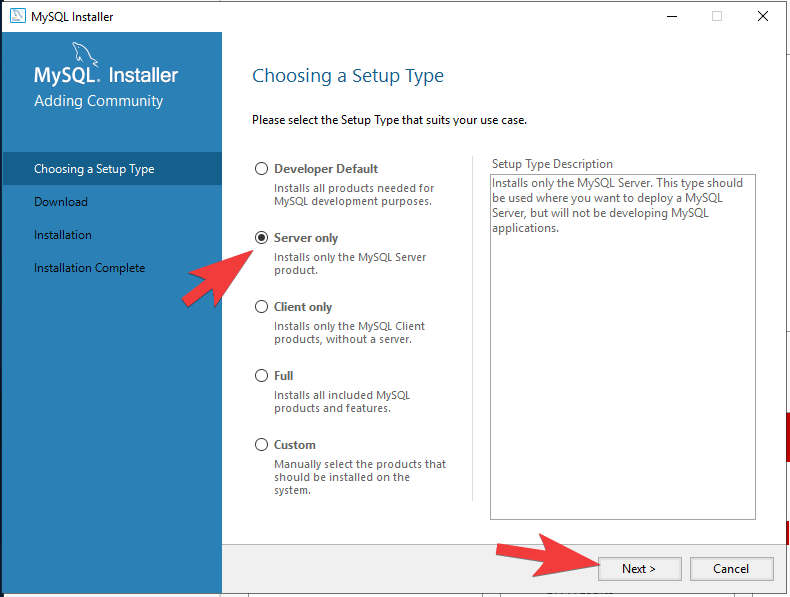
- Run the MySQL MSI Installer, select “Server only” and proceed with Next.
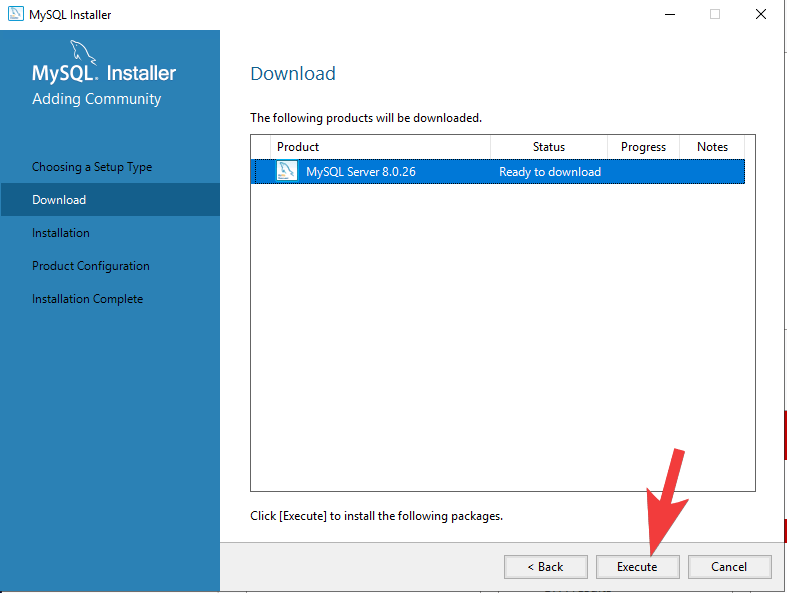
2. Click Execute, then next and execute again when it’s finished downloading if you selected the web version of MySQL.
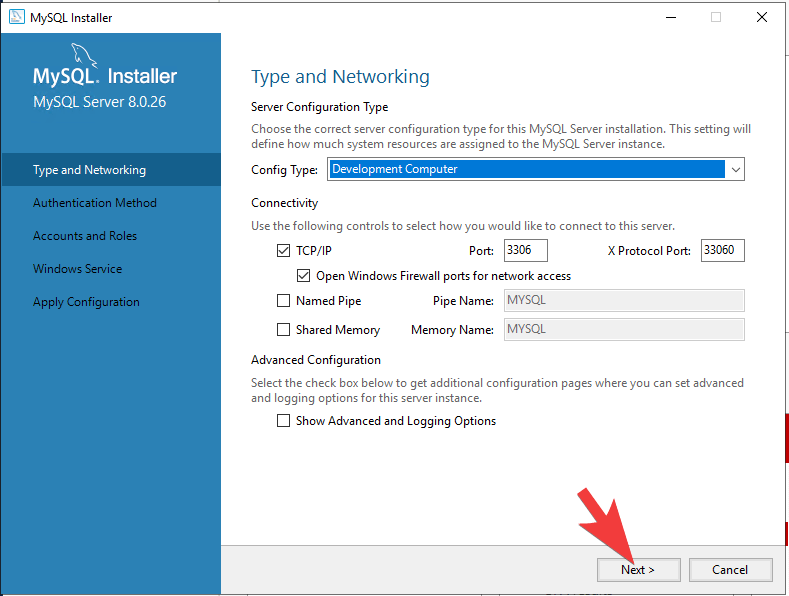
3. For Type and Networking the defaults are OK. Select Next.
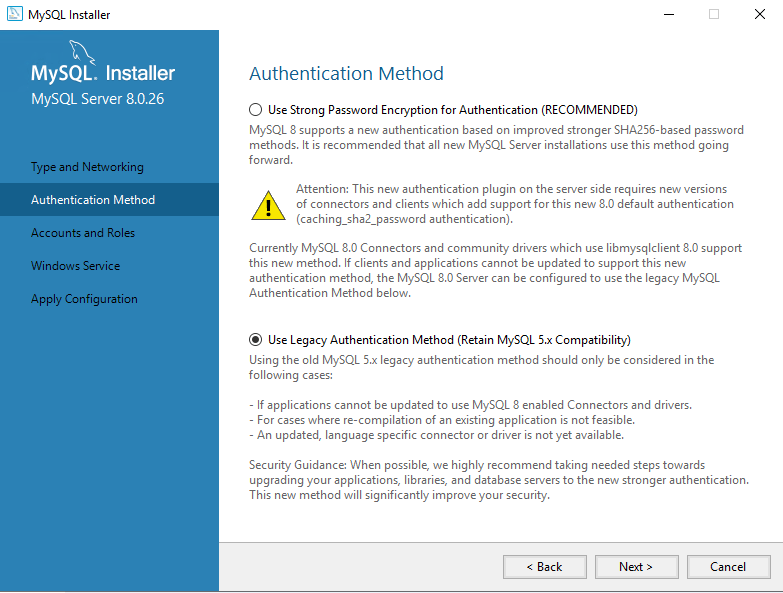
4.Authentication Method – Select “Use Legacy Authentication Method” then next. No need to add MySQL Users.
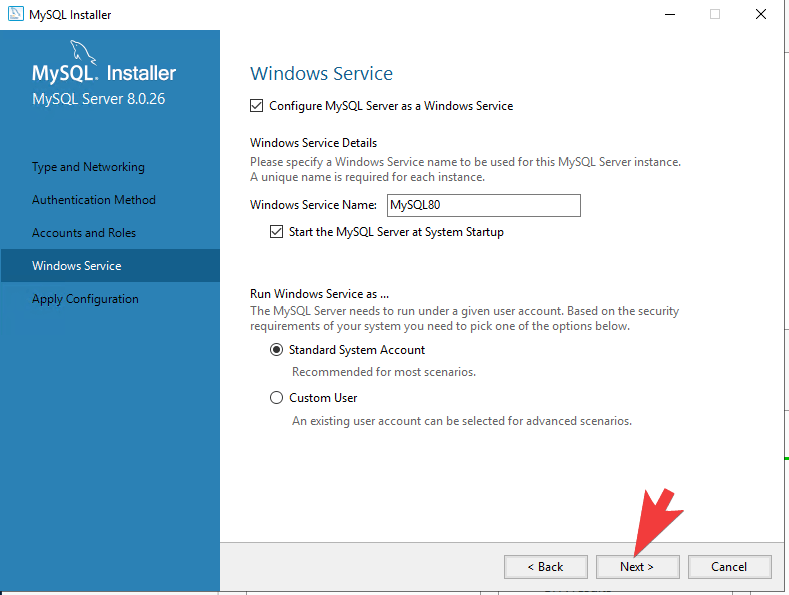
5. Windows Service – Default settings are fine in our scenario. Next
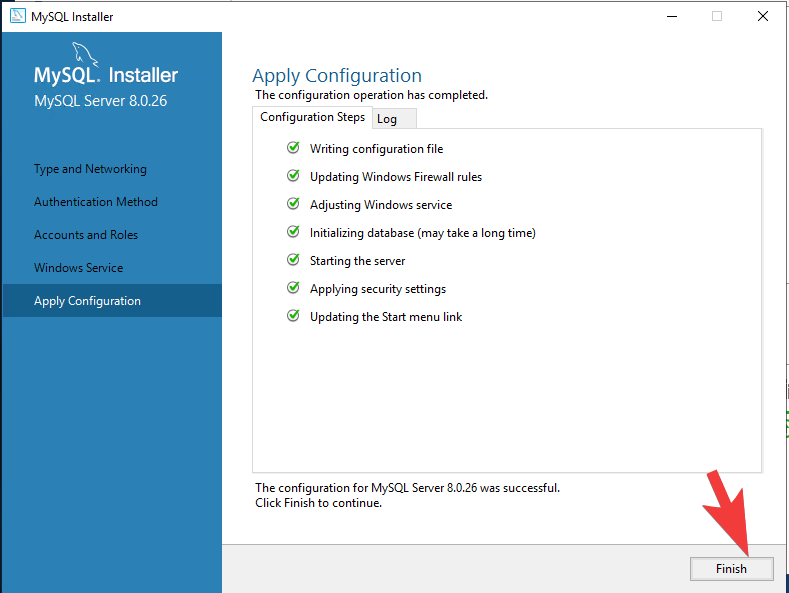
6. Apply Configuration – Click Execute then Finish!
7. Now lets install NetXMS Server (netxms-server-3.9.235-x64.msi most recent version as of writing this).
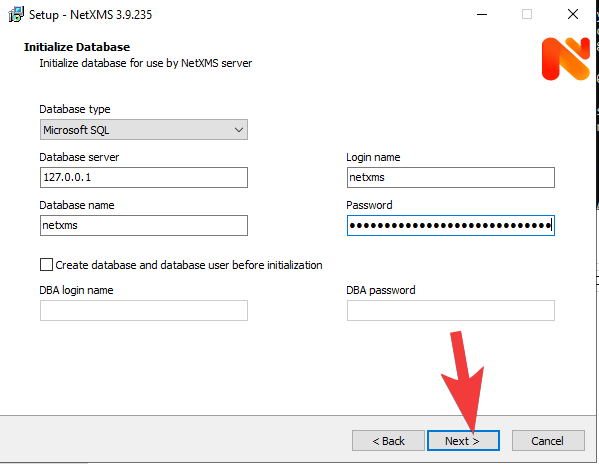
8. Continue though the wizard leaving the defaults until you get to “Initialize Database”.
9. Pause, we need to create the database for NetXMS.
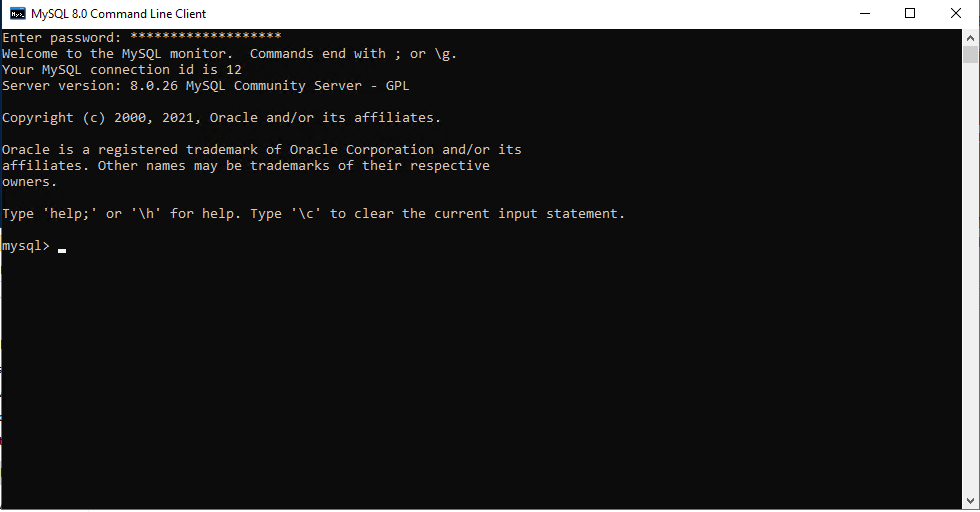
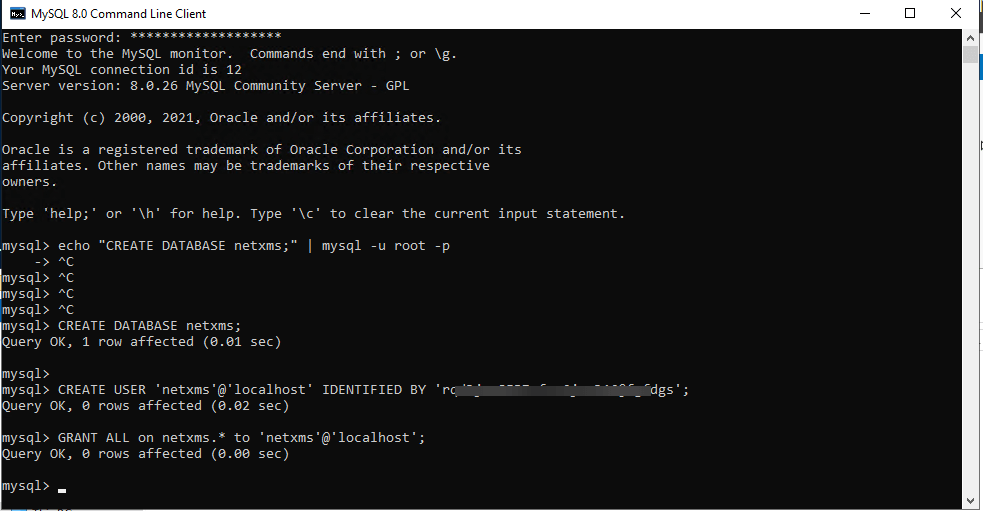
10. Go to Start and open up “MySQL 8.0 Command Line Client”. Enter your password we created earlier during the MySQL install. If the password was accepted, it should look like this:
11. Enter the following commands each line one at a time. Modify the database name, password and user as you wish.
CREATE DATABASE netxms;
CREATE USER 'netxms'@'localhost' IDENTIFIED BY 'PaSsWd';
GRANT ALL on netxms.* to 'netxms'@'localhost';
12. Since we’re installing the database on the same server as NetXMS we’ll use the loopback address (127.0.0.1) for the server. The other settings are all from the previous step.
13. Click Install
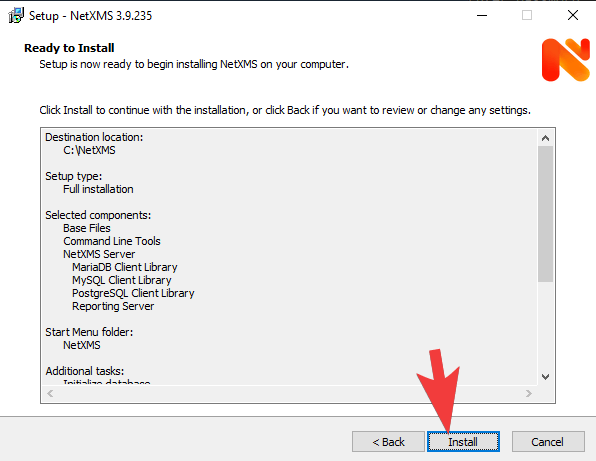
14. Install was sucessfull! If you have trouble it’s most likely due to step 4 and not using the legacy method.
Notes from https://www.netxms.org/documentation/adminguide/installation.html#id9
MySQL note Bundled MySQL database drive does not support caching_sha2_password authentication which is default for MySQL starting from version 8. Either select Legacy Authentication Method when installing MySQL, or use database driver installed along with MySQL. Database driver gets installed when installing MySQL with Server-only option, however these two folders should be included into system path: C:\Program Files\MySQL\MySQL Server 8.0\lib C:\Program Files\MySQL\MySQL Server 8.0\bin.
Microsoft SQL note:
If you wish to use Windows authentication for database connectivity, use * (asterisk) as a login name and leave the password field blank. If you specify asterisk as DBA login, user with which you are logged in to Windows should have administrative rights to the database server. If you use asterisk as DB login, you should run NetXMS Server service as a user with appropriate rights to the database.
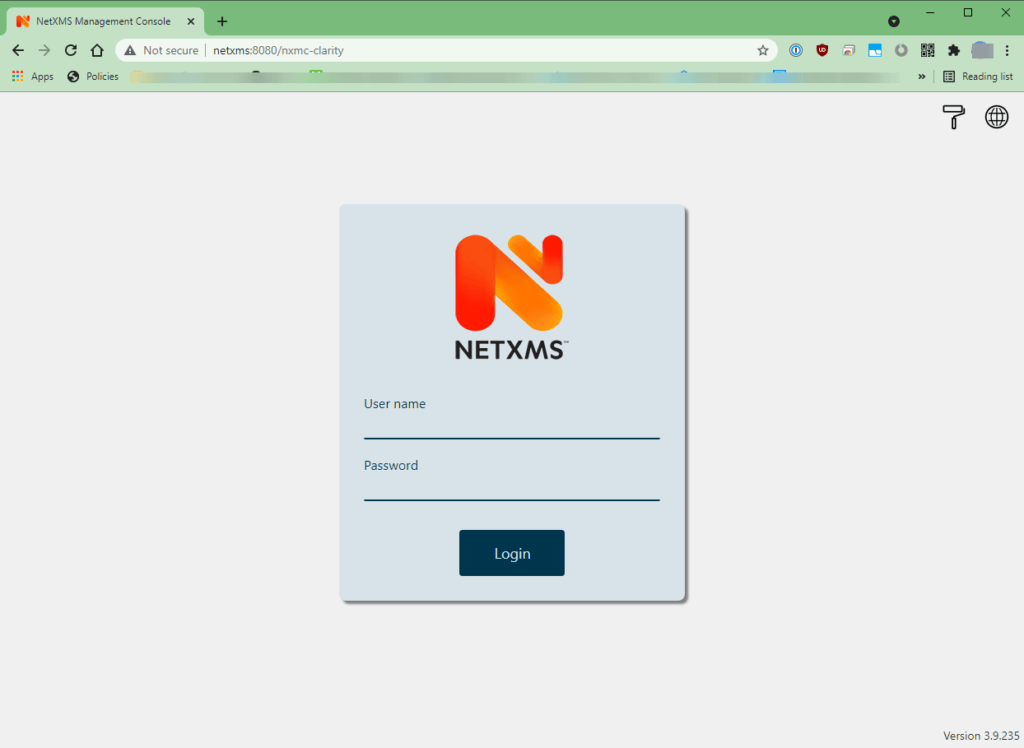
15. Install the Web GUI (netxms-webui-3.9.235-x64.msi) using the defaults.
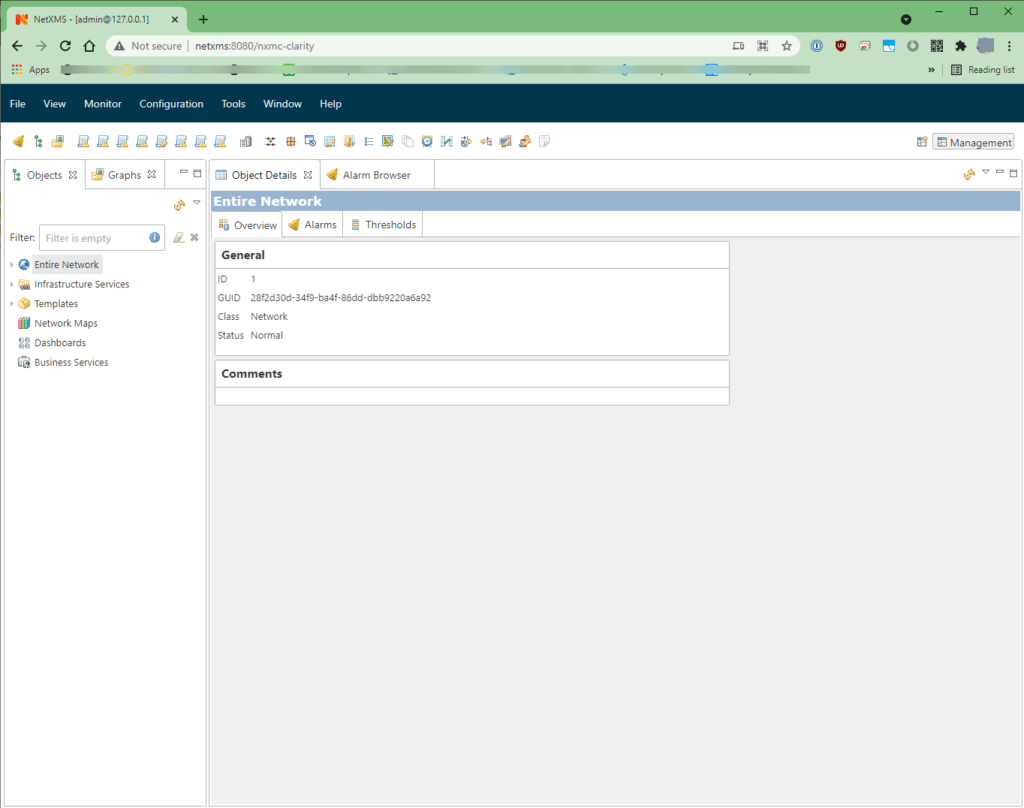
16. If all went well if you browse via IP:8080, localhost:8080, hostname:8080 you should be greeted with:
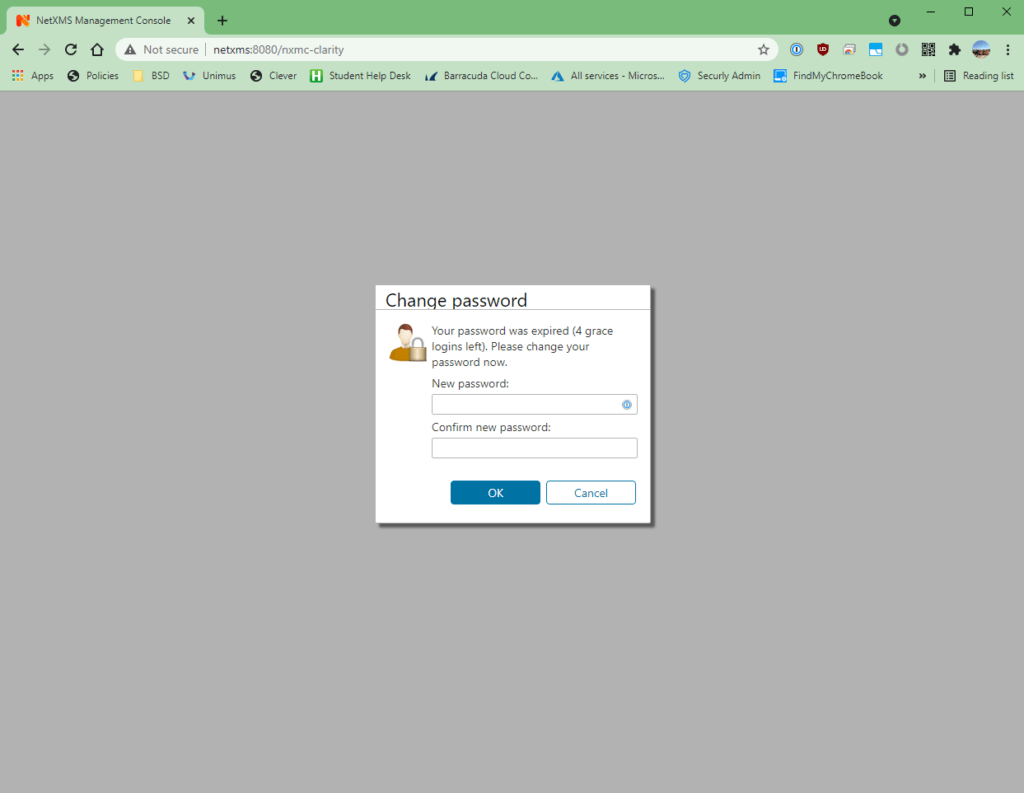
17. On login you’ll be prompt to change the password:
18. Success! Enjoy, now I have to dig in on how to use it!
Thank you!!!