
I’ve been tasked with deploying bitlocker to our domain which consists of 800+ staff and over 5,500 students. So here I’ll document the process.
Install Server Feature
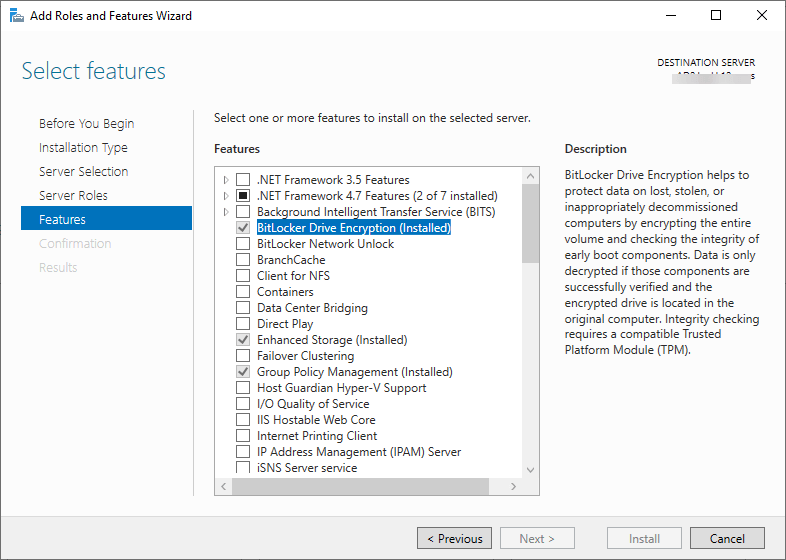
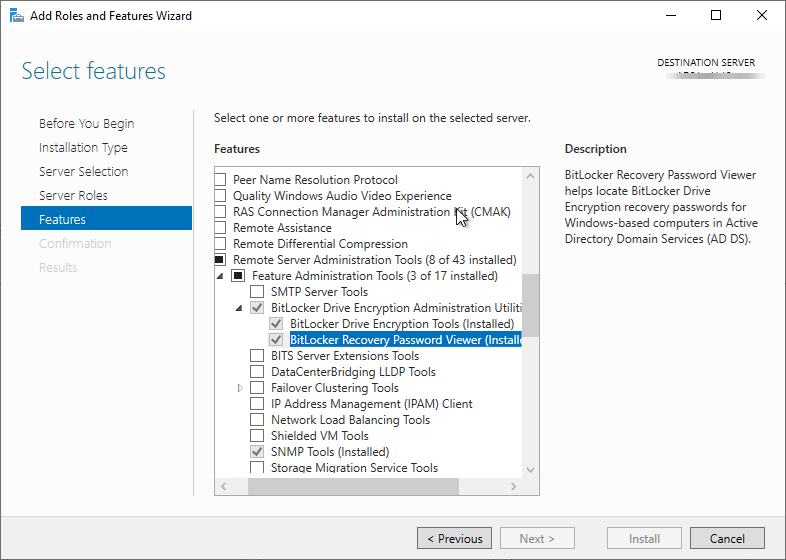
On your domain controller open the server manager and add roles and features. Under features install “BitLocker Drive Encryption” Just a note, you’ll need to reboot to complete installation.
By default it should automatically include the utilities used to view them in AD.
Create the Group Policy Object (GPO)
There seems to be a split between strictly using a GPO to deploy BitLocker or using the GPO in addition to a batch/PowerShell script to kick off the encryption. After playing with the deployment I’ve opted for not using a script as it just add more complexity that isn’t needed.
So, in my TEST OU (with my test computer) I’ve created a new GPO called “Deploy BitLocker” Edit the OU and lets configure the settings.
Browse to Computer Configuration > Policies > Administrative Templates> Windows Components > BitLocker Drive Encryption
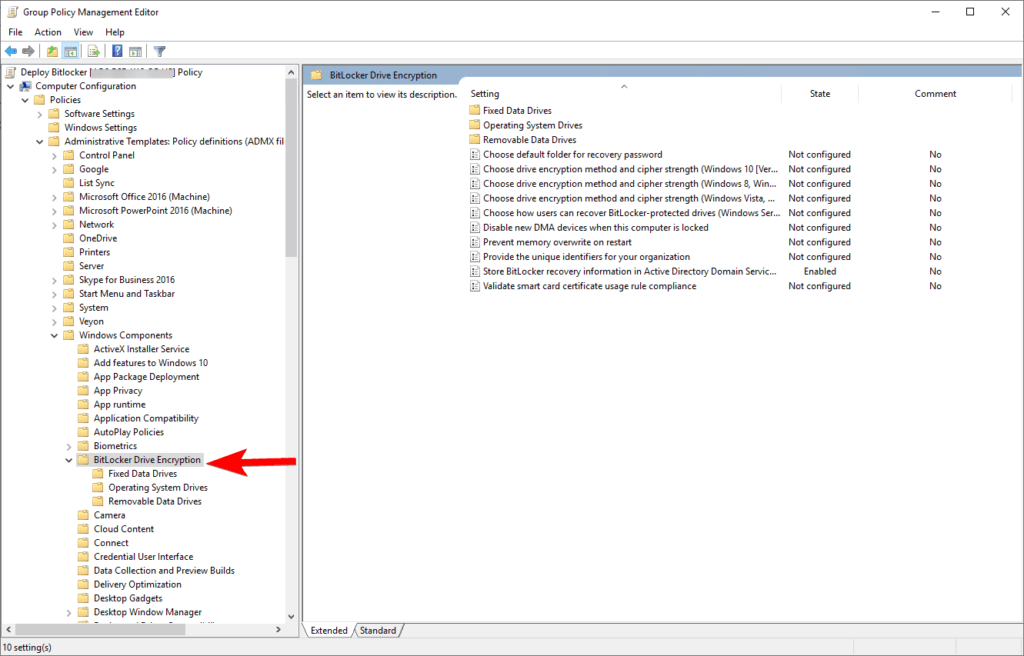
ENABLE – Store BitLocker recovery information in Active Directory Domain Services
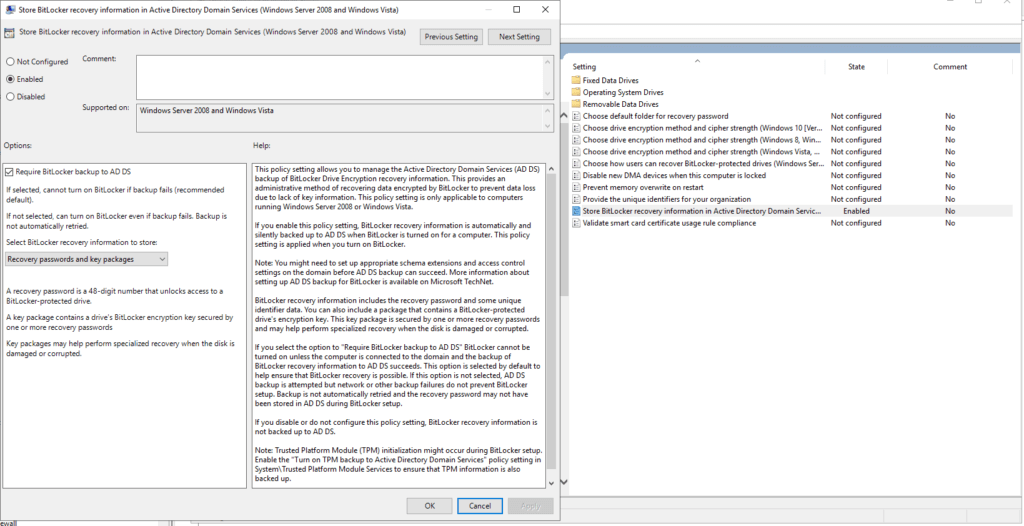
setting is only applicable to computers running Windows Server 2008 or Windows Vista.
If you enable this policy setting, BitLocker recovery information is automatically and silently backed up to AD DS when BitLocker is turned on for a computer. This policy setting is applied when you turn on BitLocker.
Navigate to the sub folder “Operating System Drives”. We’ll make changes to 3 settings here.
ENABLE – Allow network unlock at startup
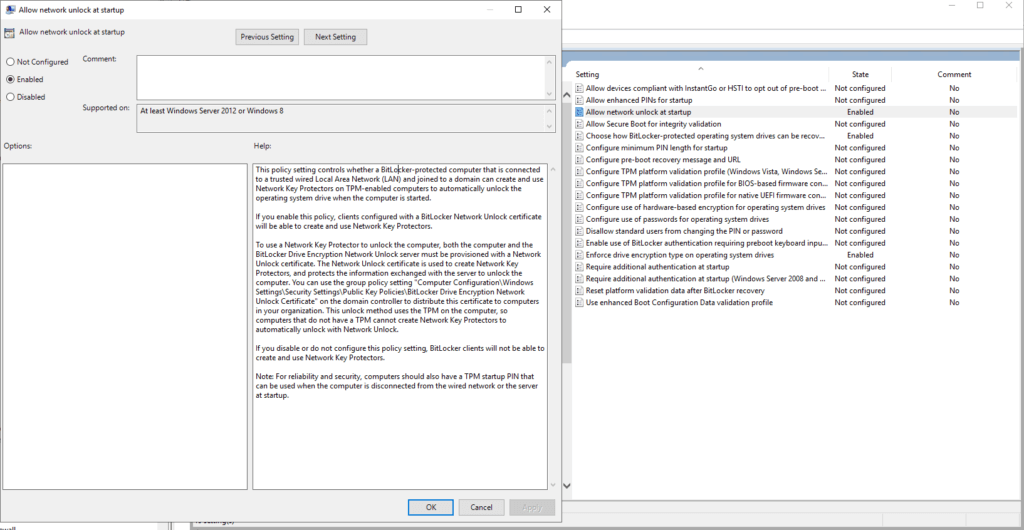
If you enable this policy, clients configured with a BitLocker Network Unlock certificate will be able to create and use Network Key Protectors.
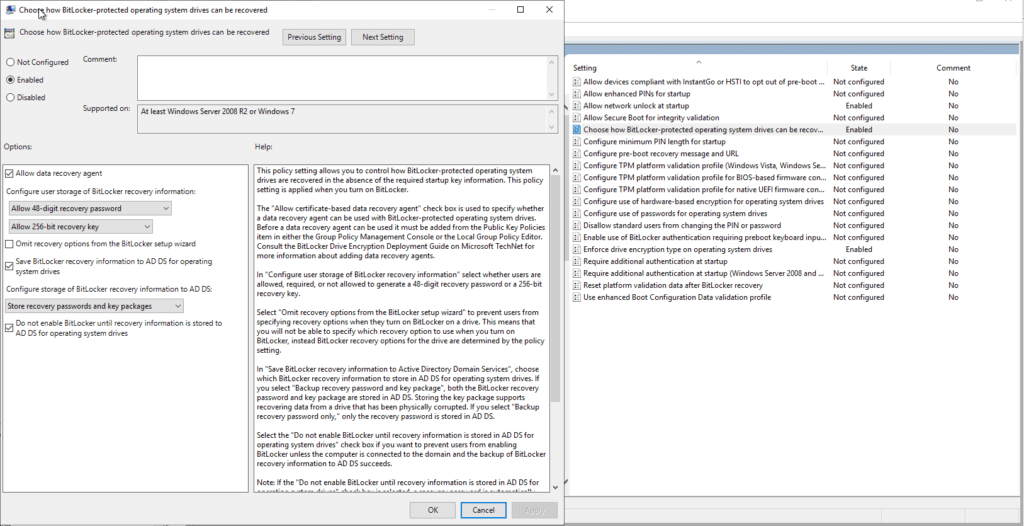
ENABLE – Choose how BitLocker-protected operating system drives can be recovered.
The defaults should be fine except I would recommend checking “Do not enable BitLocker until recovery information is stored to AD DS for operating system drives.
ENABLE – Enforce drive encryption type on operating system drives.
This one is you’ll want to choose which best fits your organization. I’ve chosen “Full Encryption”

Now lets test!
With the computer in your TEST OU, you can either reboot it or open PowerShell (don’t forget to run as admin) and type in gpedit /force
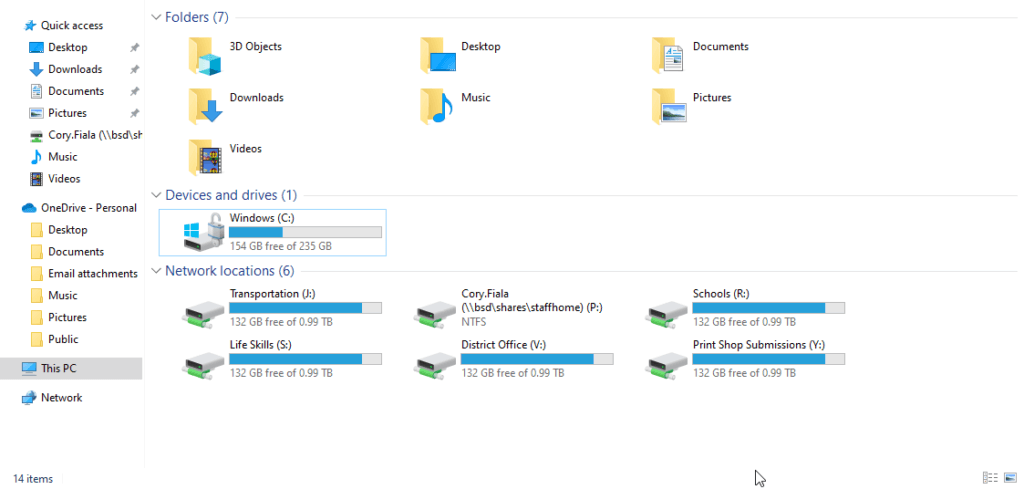
Log out and back or reboot and go to This PC.
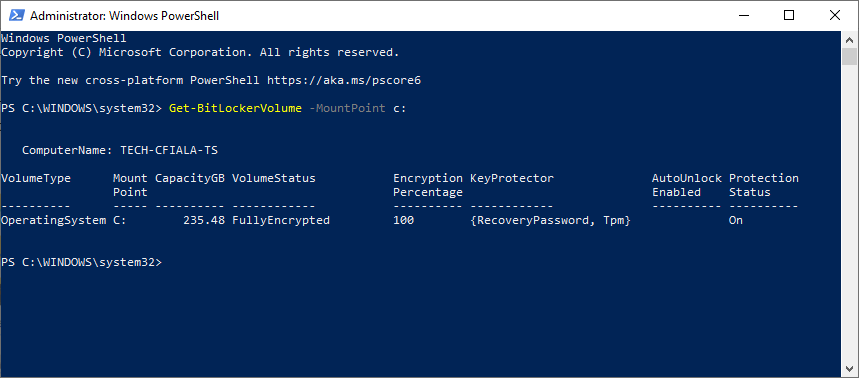
Another verification can be done via PowerShell.
Get-BitLockerVolume -MountPoint <drive letter>
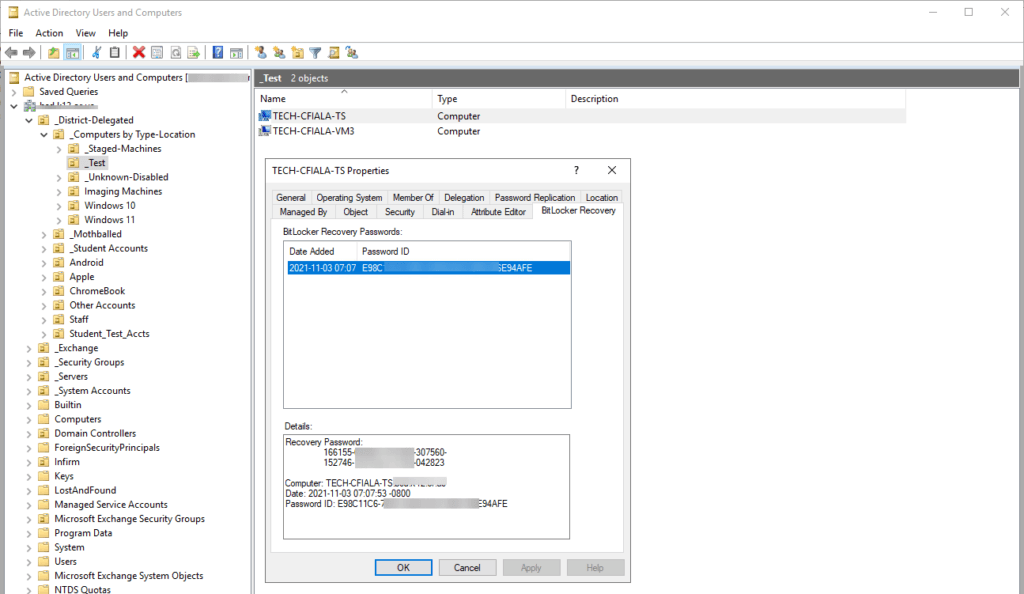
Verify the key is in AD
Tip: You may need to restart the Active Directory Users and Computers program.
Find your test machine in AD, right click it and select properties. You should now have the “BitLocker Recovery” tab. If it worked, you should see the new Password ID and date.
If nothing showed up, verify on the test machine it received your new policy with gpedit /result. Also does the machine have TPM? If not you’ll need to make some more changes to the GPO to allow devices without TPM. We’ve decided to only deploy BitLocker to devices that support TPM.
Hope this helps as this was my first time deploying BitLocker.
Hi,
Thanks for this article.
Question:
Once Bitlocker is on, does it start the encryption process? How does this look on the client machine?
Thanks